Content Delivery > Image Manager > Console User Guide
This document explains how to create folders, upload files, and manage thumbnail options using the console.
Manage Folders and Image Files
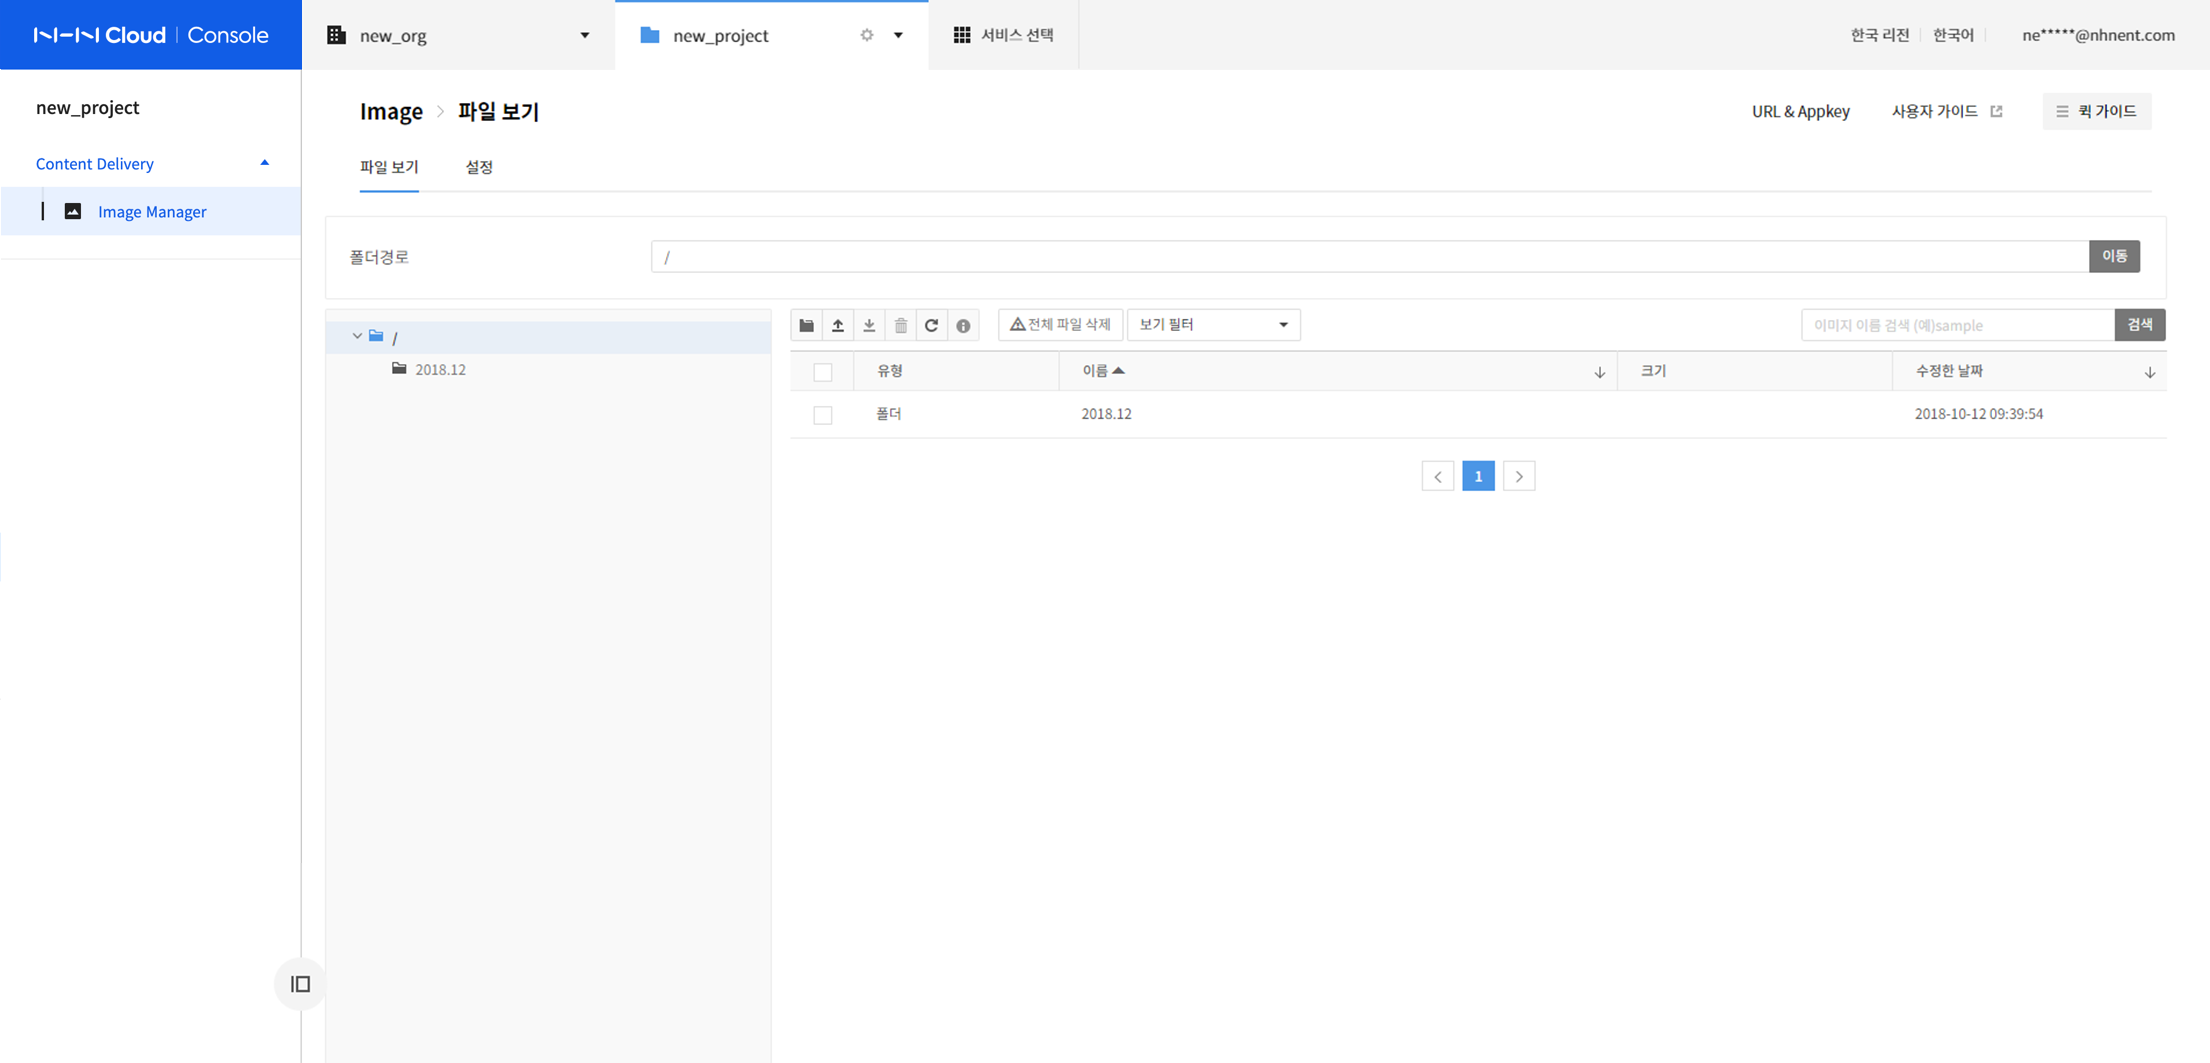
You can manage folders, original image files, and created thumbnail image files on the File View screen of the menu.
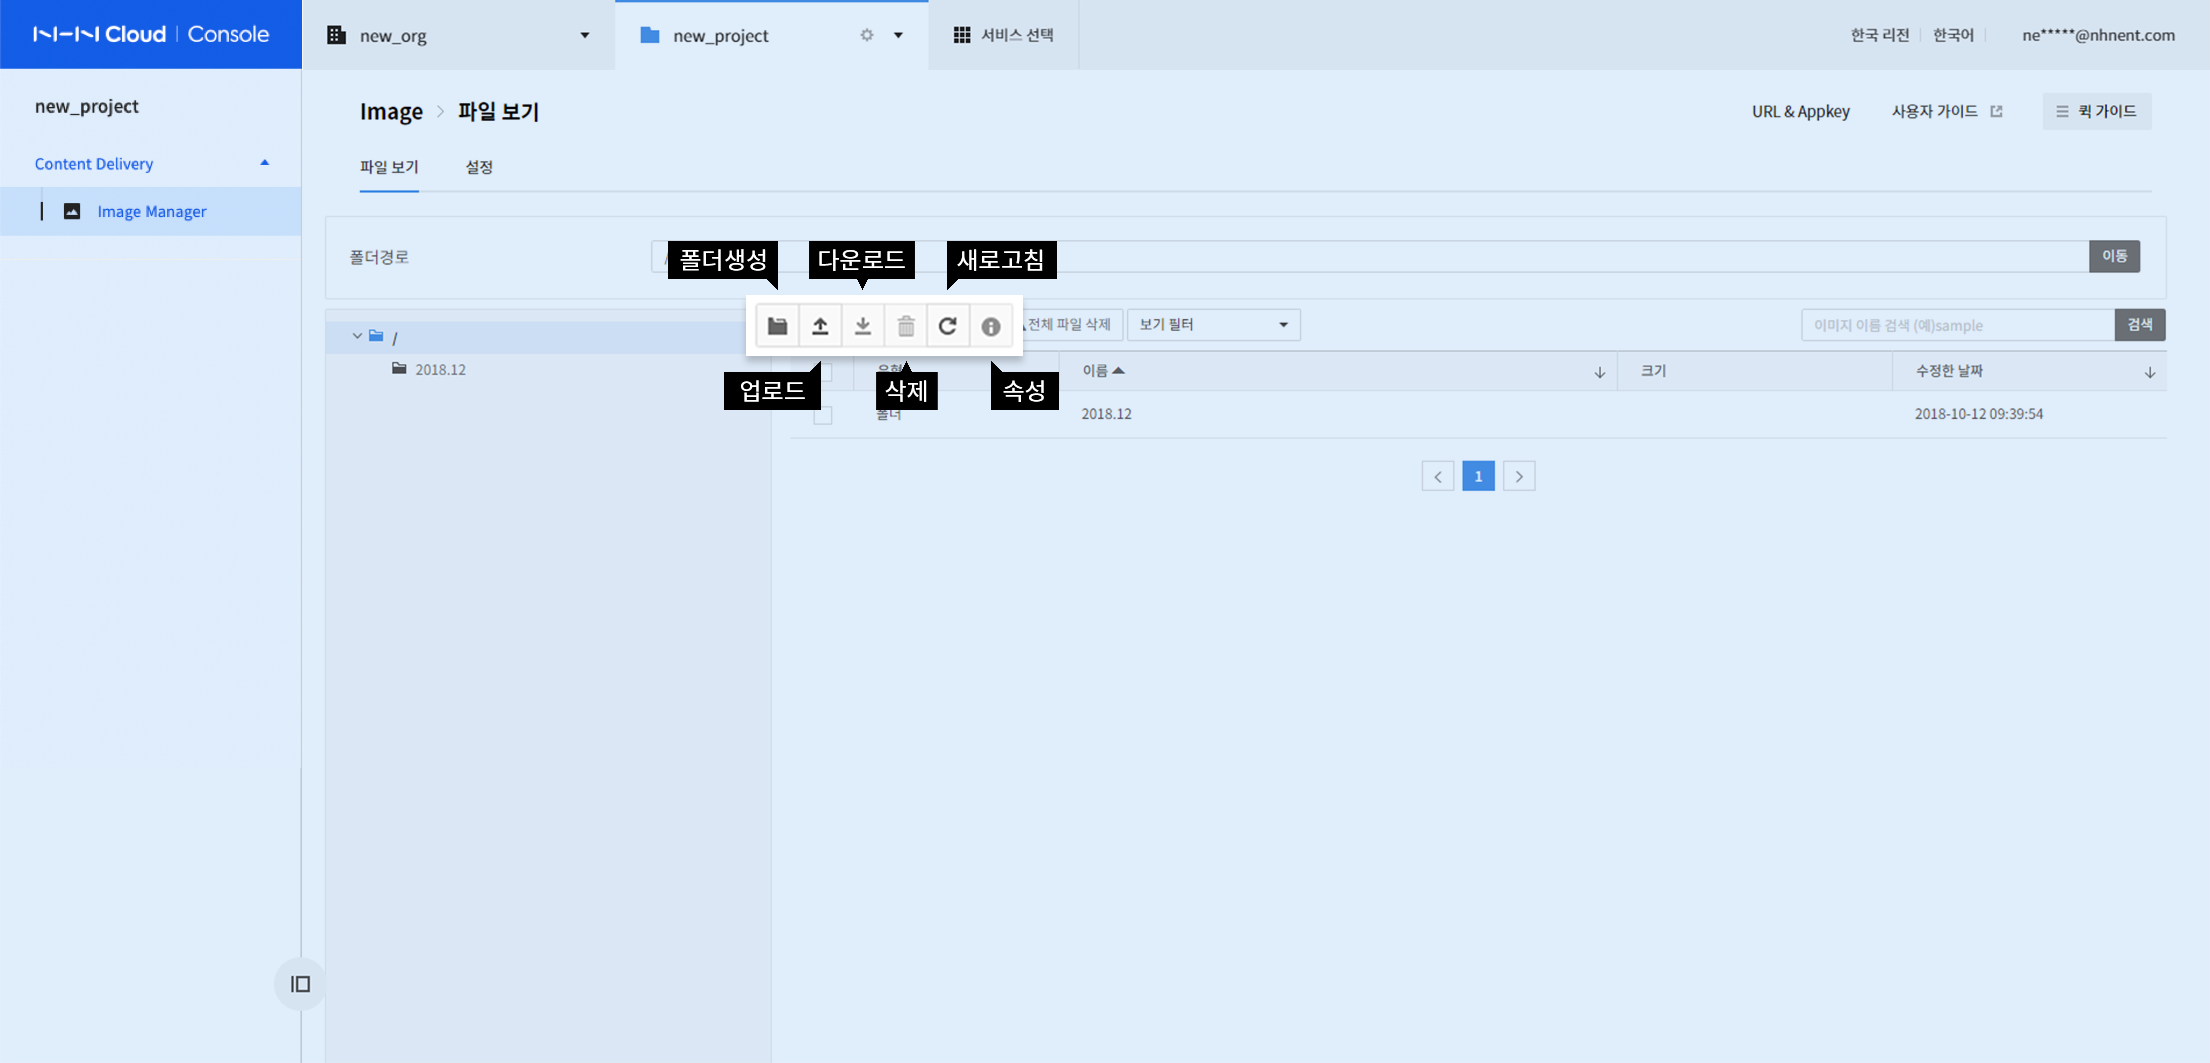
Toolbar Icon Description
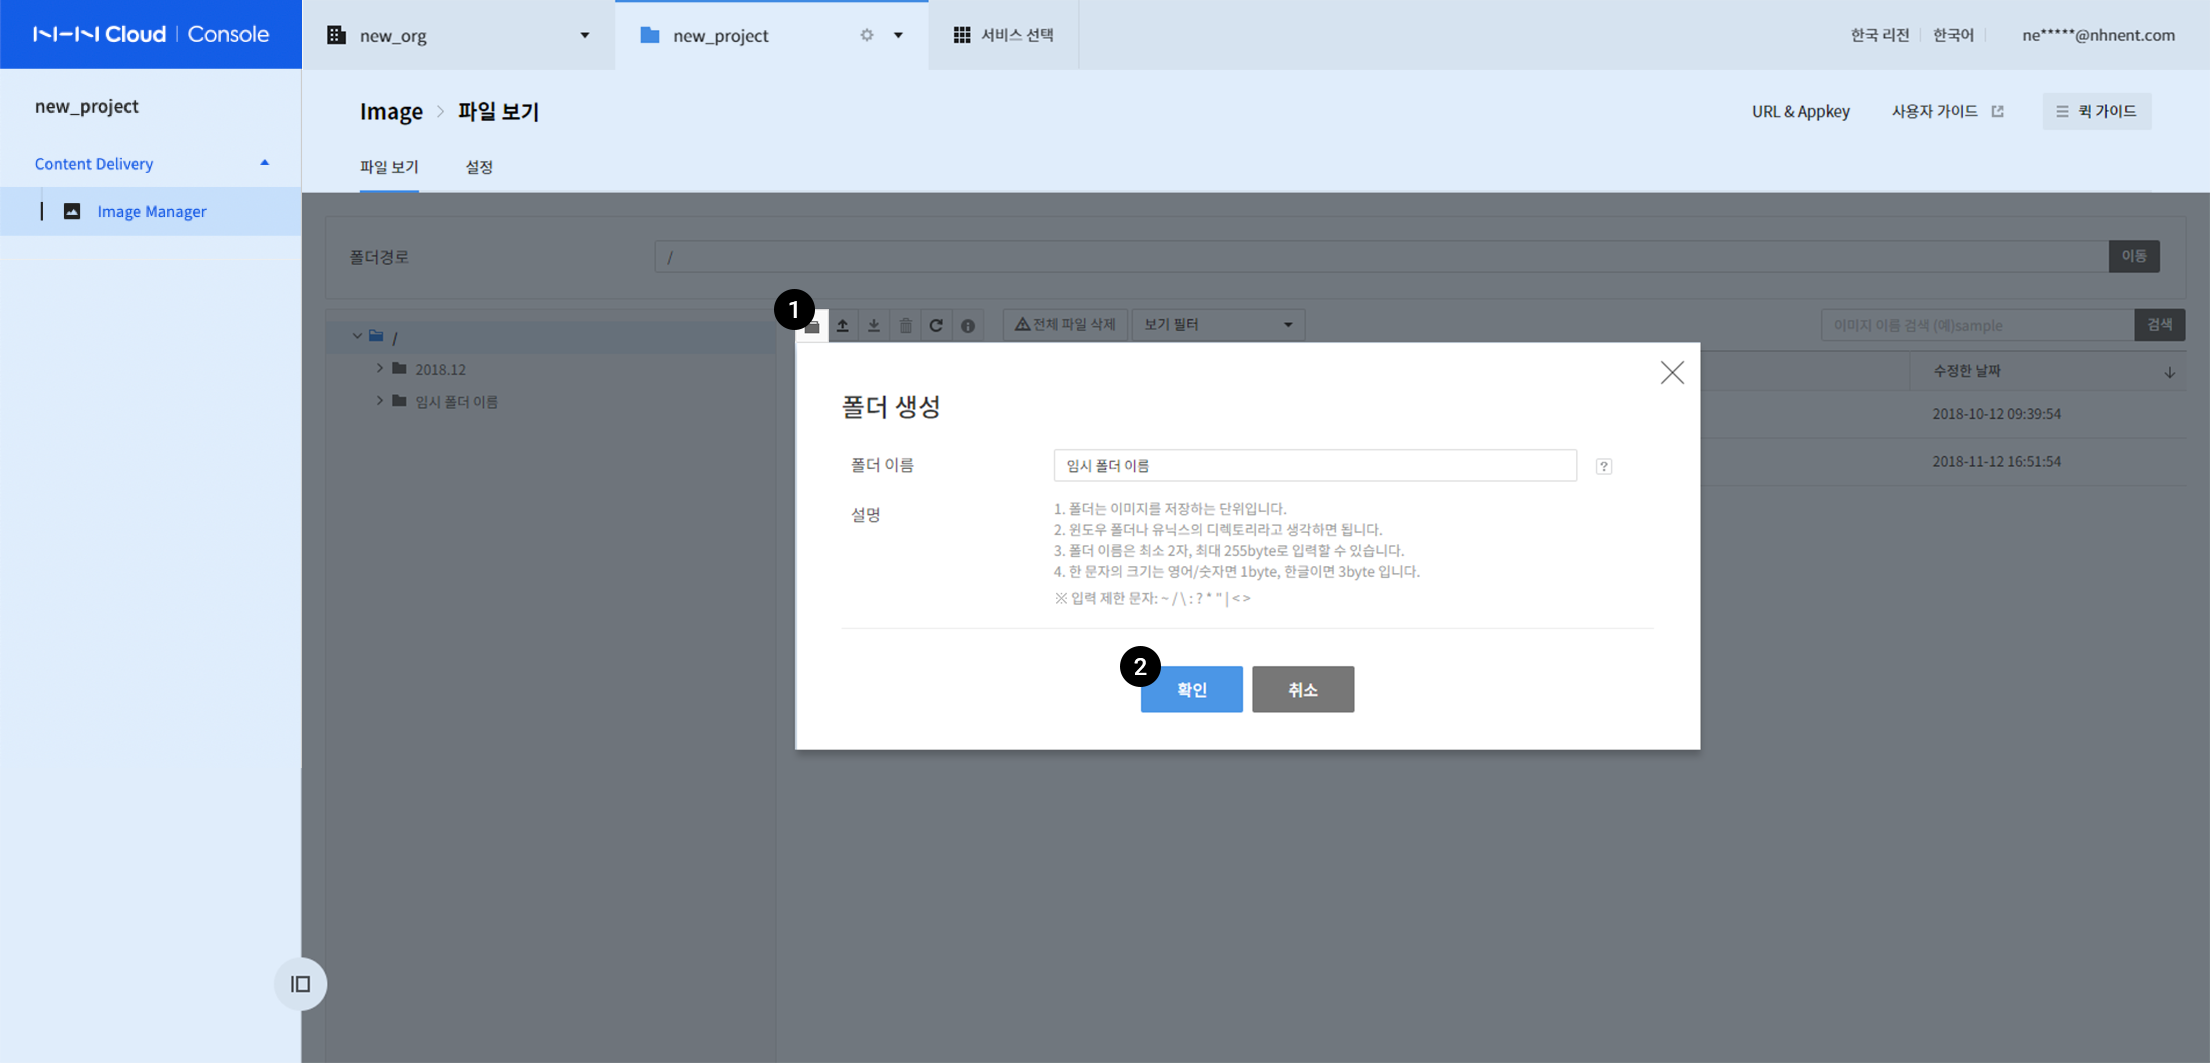
Create a Folder
-
A folder is the basic unit for storing images, and it is created by clicking the Create Folder button.
-
Enter a folder name and click OK.
-
A function to edit the name of a folder is not provided.
- If you need to modify the name, you must delete the folder and re-create a folder.
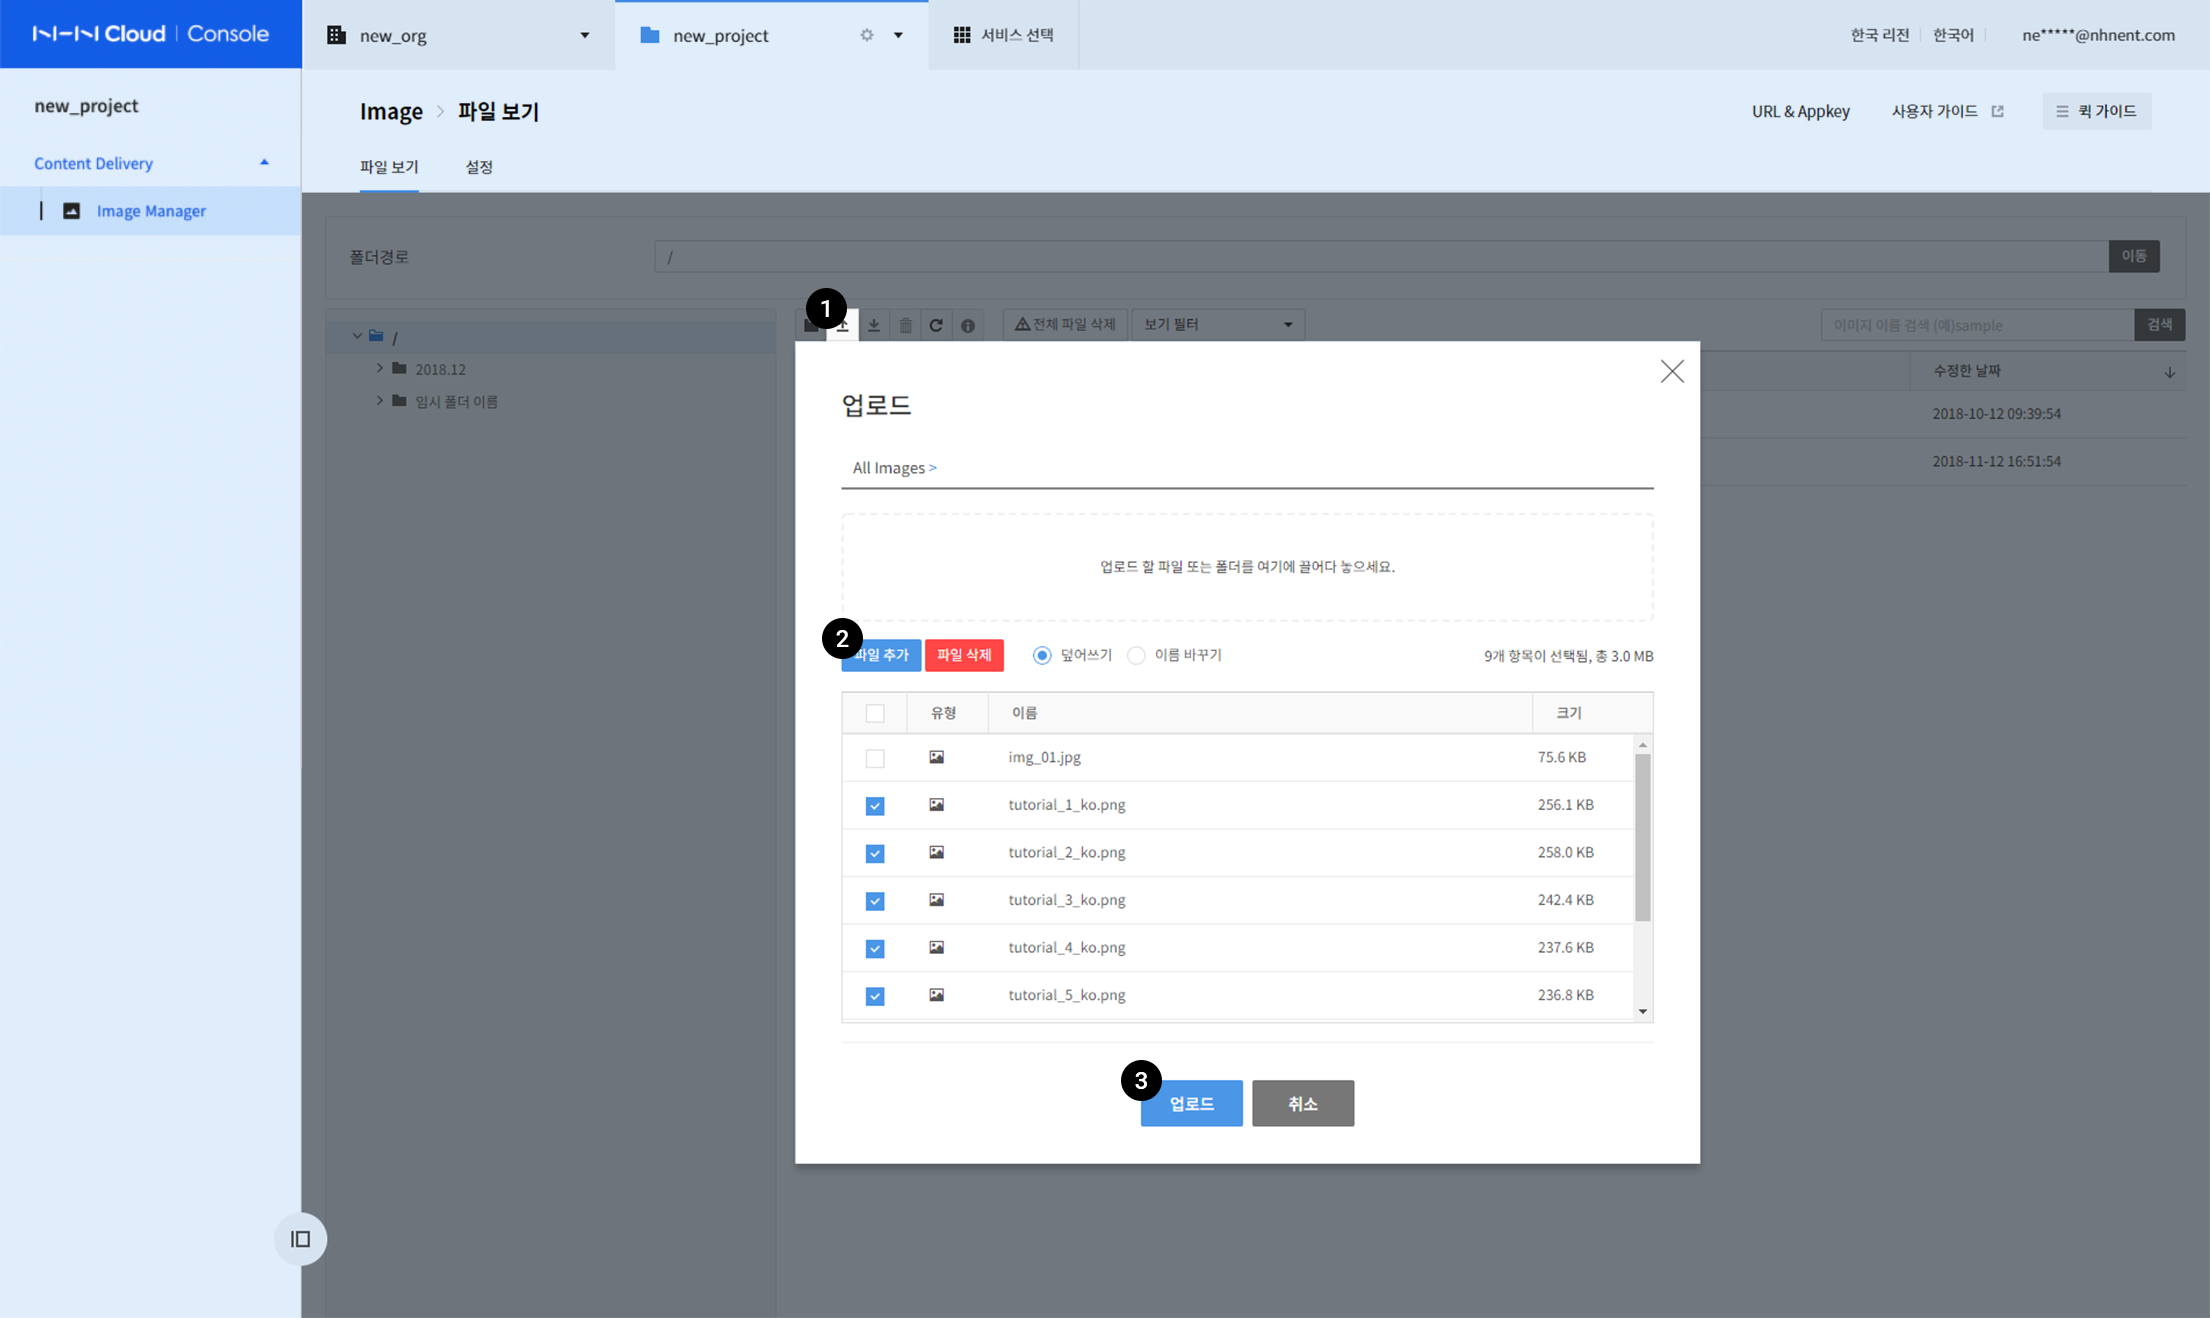
Upload Image Files
-
Select the desired folder to move into it, and click the Upload button.
-
You can upload multiple images at once, and you can also upload folders and compressed files.
-
When uploading a compressed file, the name of the folder within the compressed file must be at least two letters long.
-
Drag and drop image files, or click Add Files to select files to upload.
-
Select 'Overwrite' or 'Change Name' to handle files with the same name, and click Upload.
-
When the upload is completed normally, the screen is updated and you can check the file list.
Download
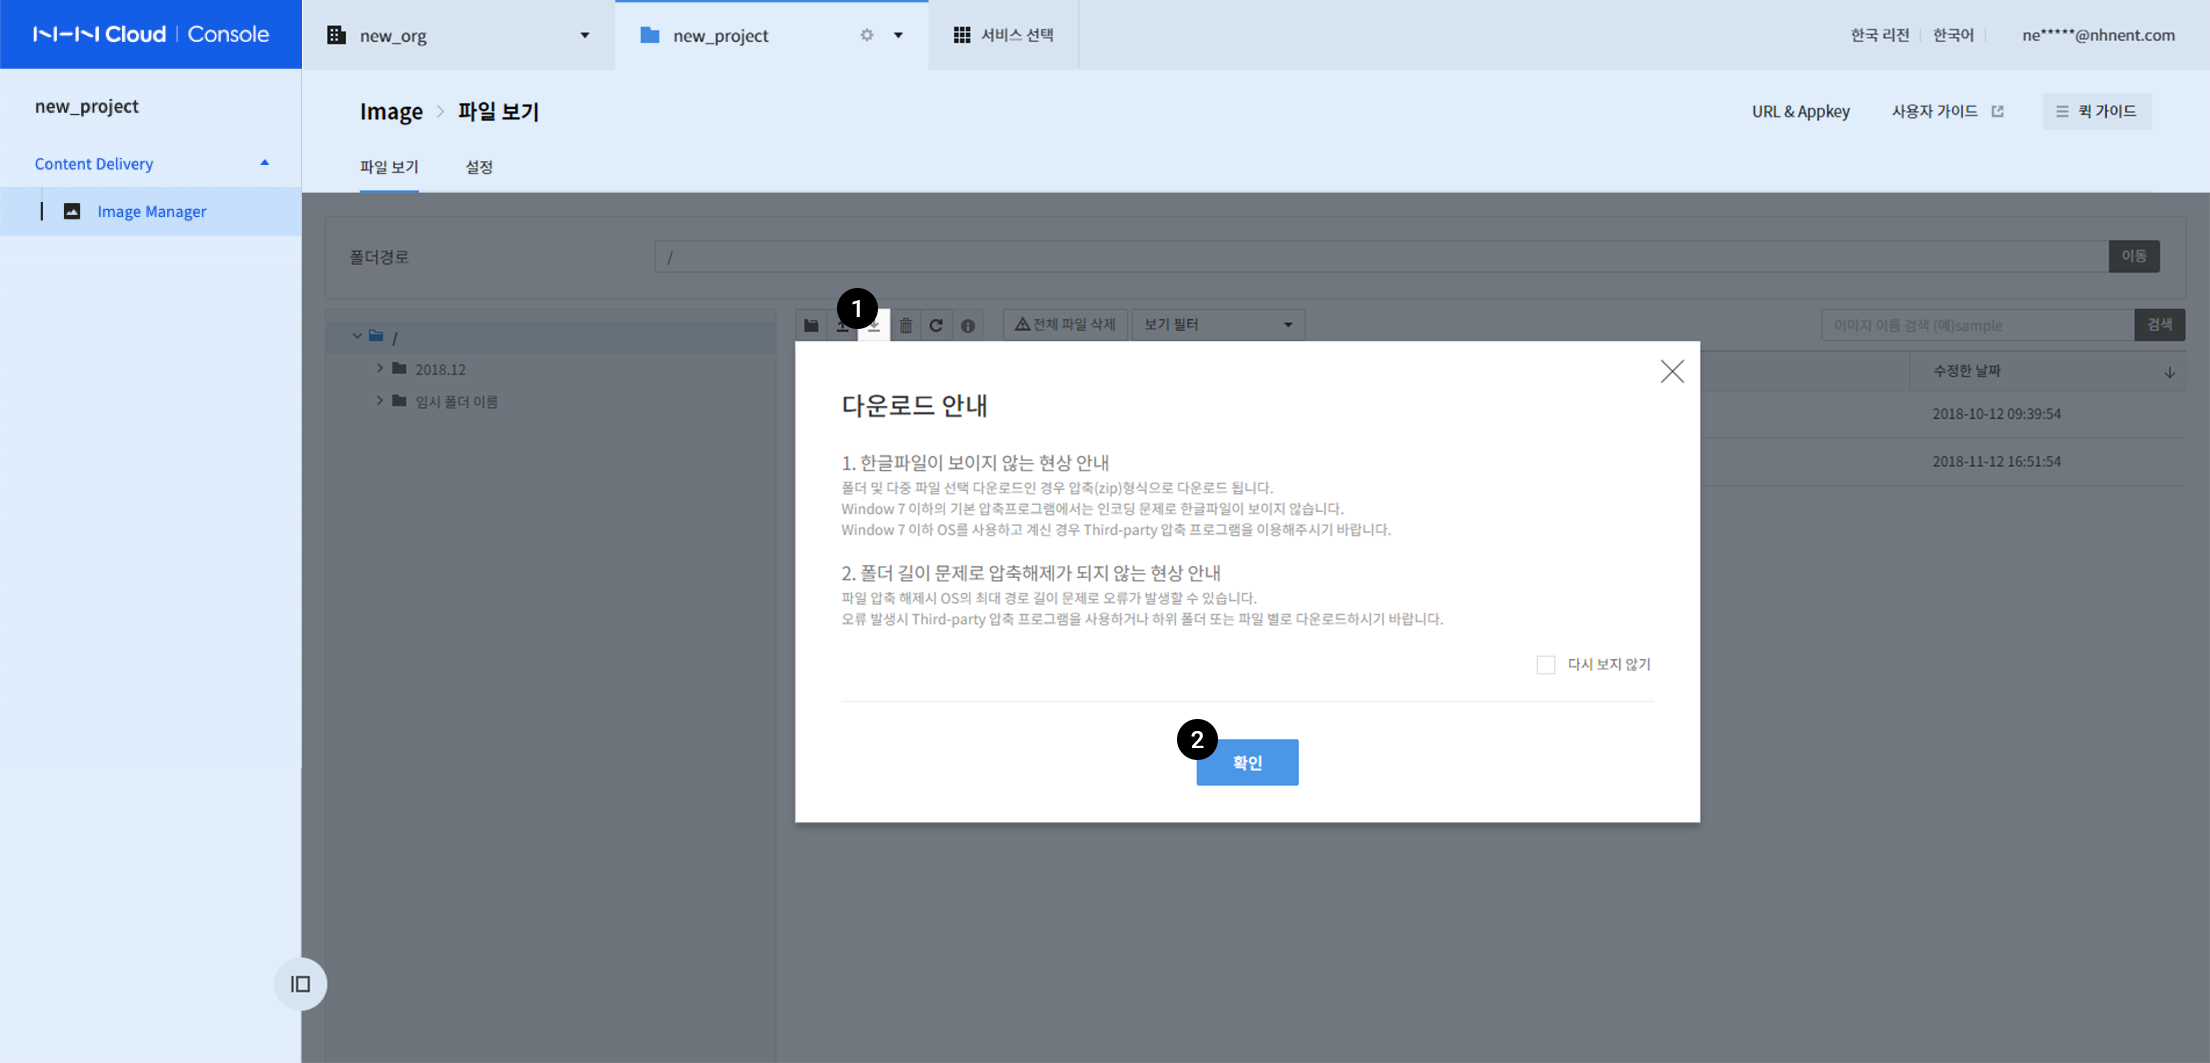
-
After selecting a folder or image files to download, click the Download button.
-
If you select one image file after clicking the OK button, it will be downloaded immediately. If you select two or more files, the compressed file
nhn_cloud_image_manager.zipwill be downloaded. -
You can only download up to 10,000 images at a time, and even if you download images stored in a folder, only 10,000 images can be downloaded in the same way.
Delete Files or a Folder
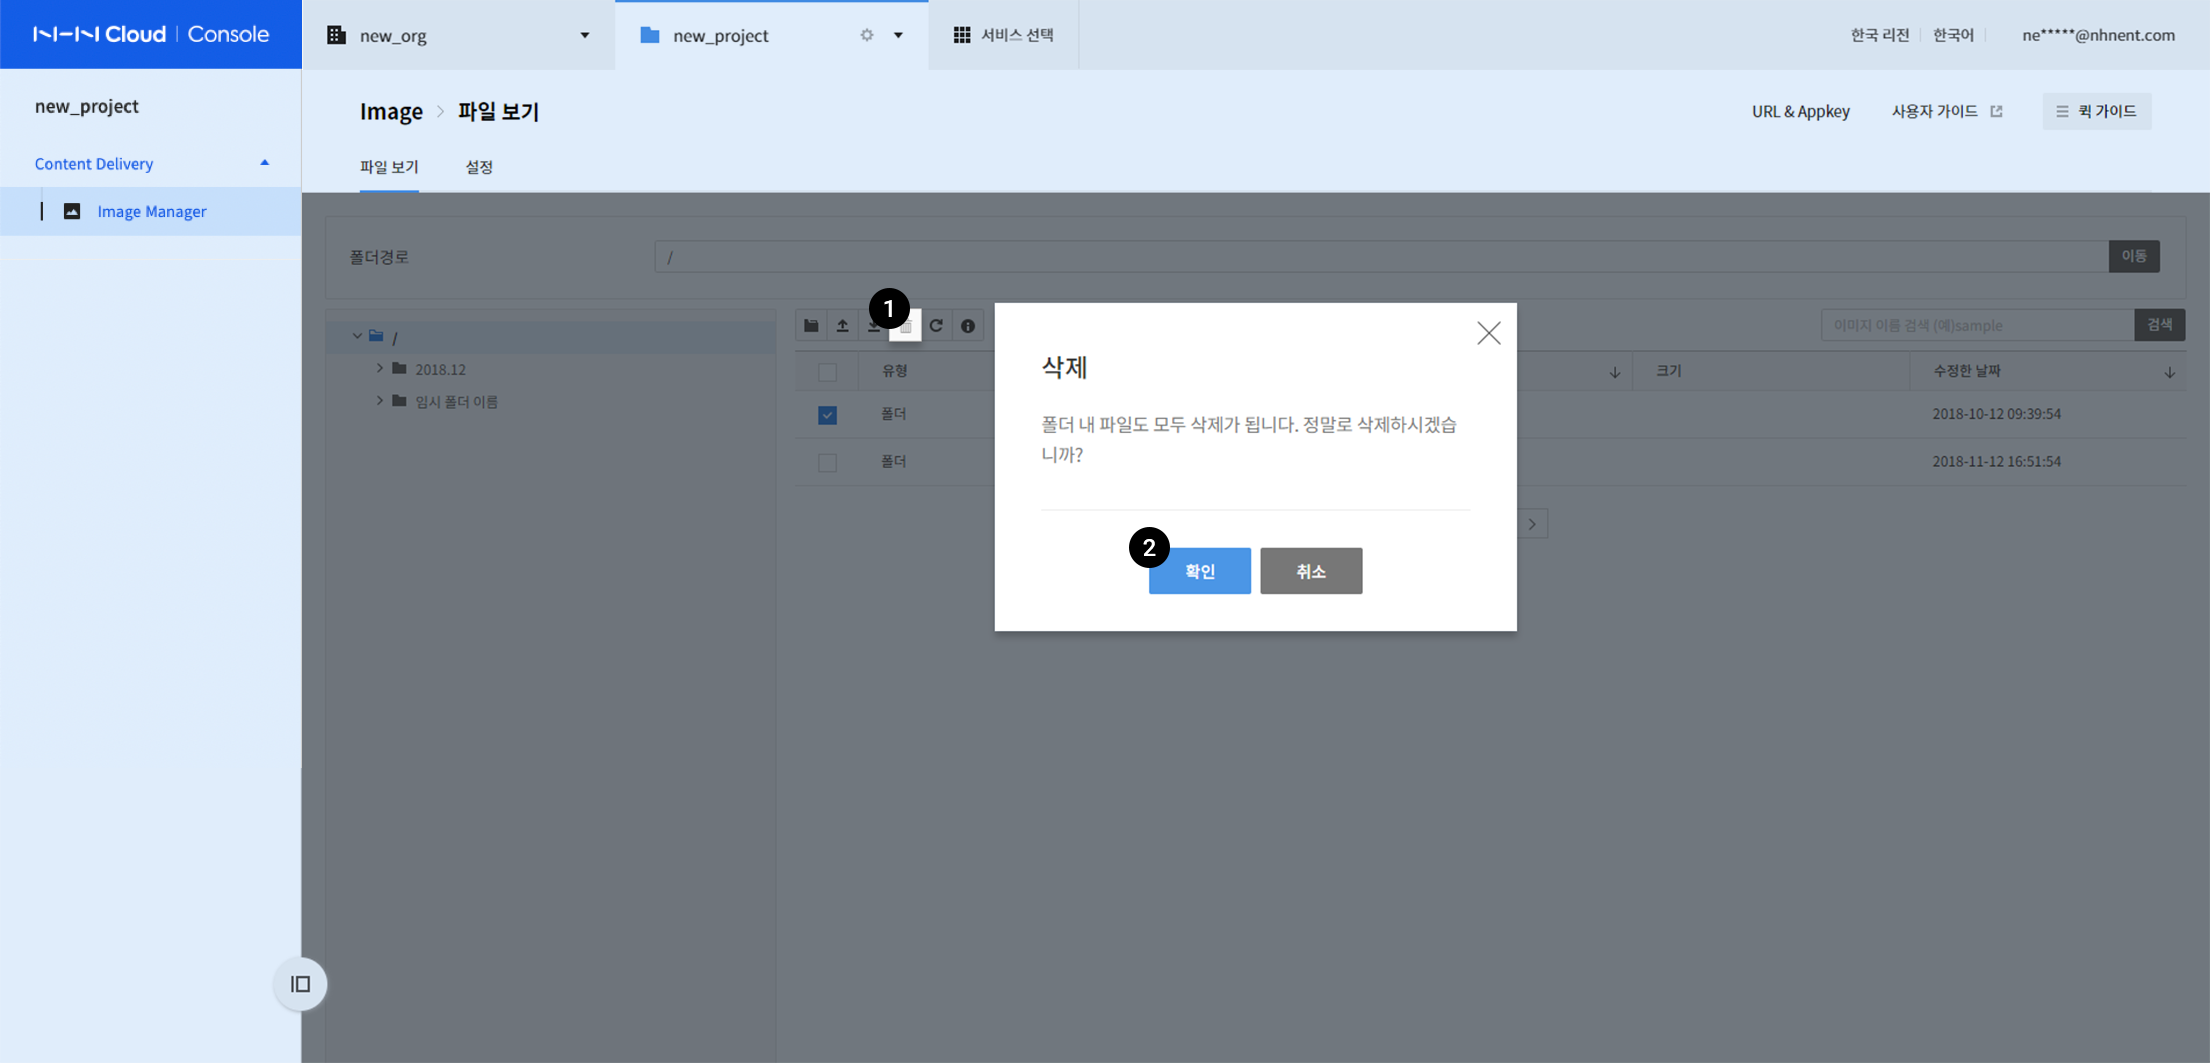
-
After selecting the folder or image files to delete, click the Delete button.
-
Click Confirm.
-
If you select a folder, all files in that folder are also deleted.
View Properties
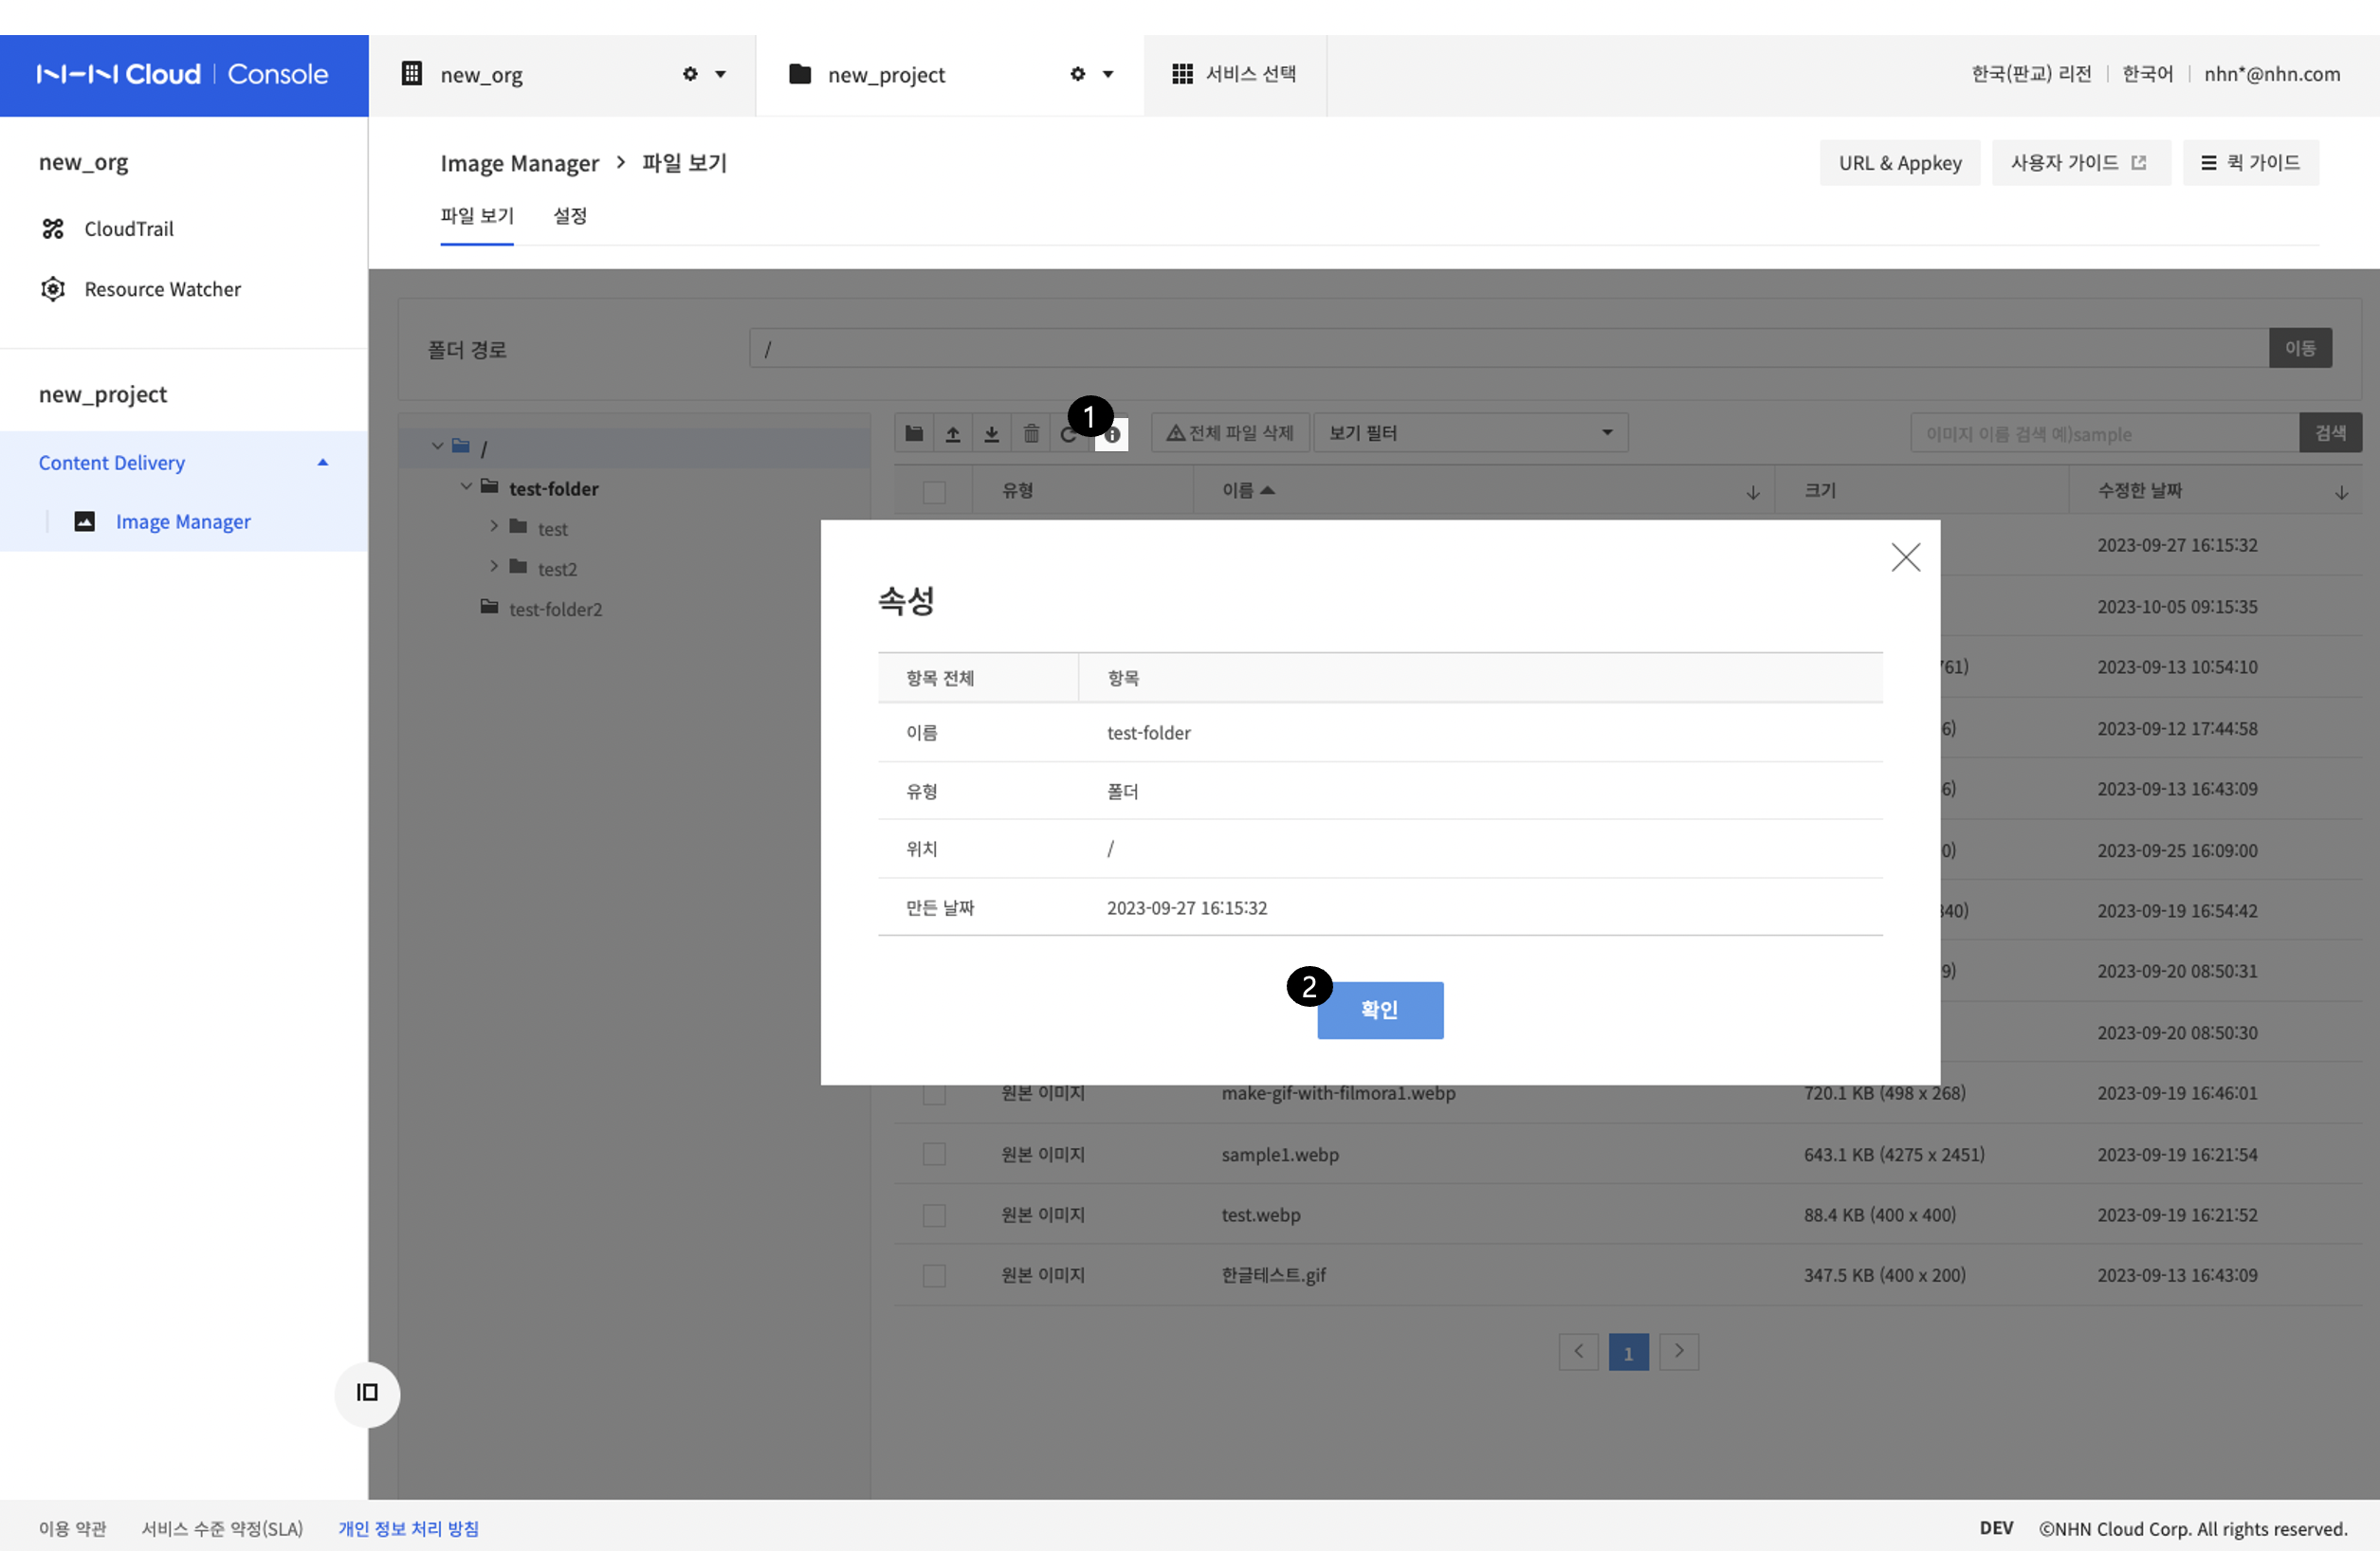
Select one folder or image file and click the Properties button.
- If you select an image file, you can check the image's width and height, download URL, and meta information.
Query and View the List
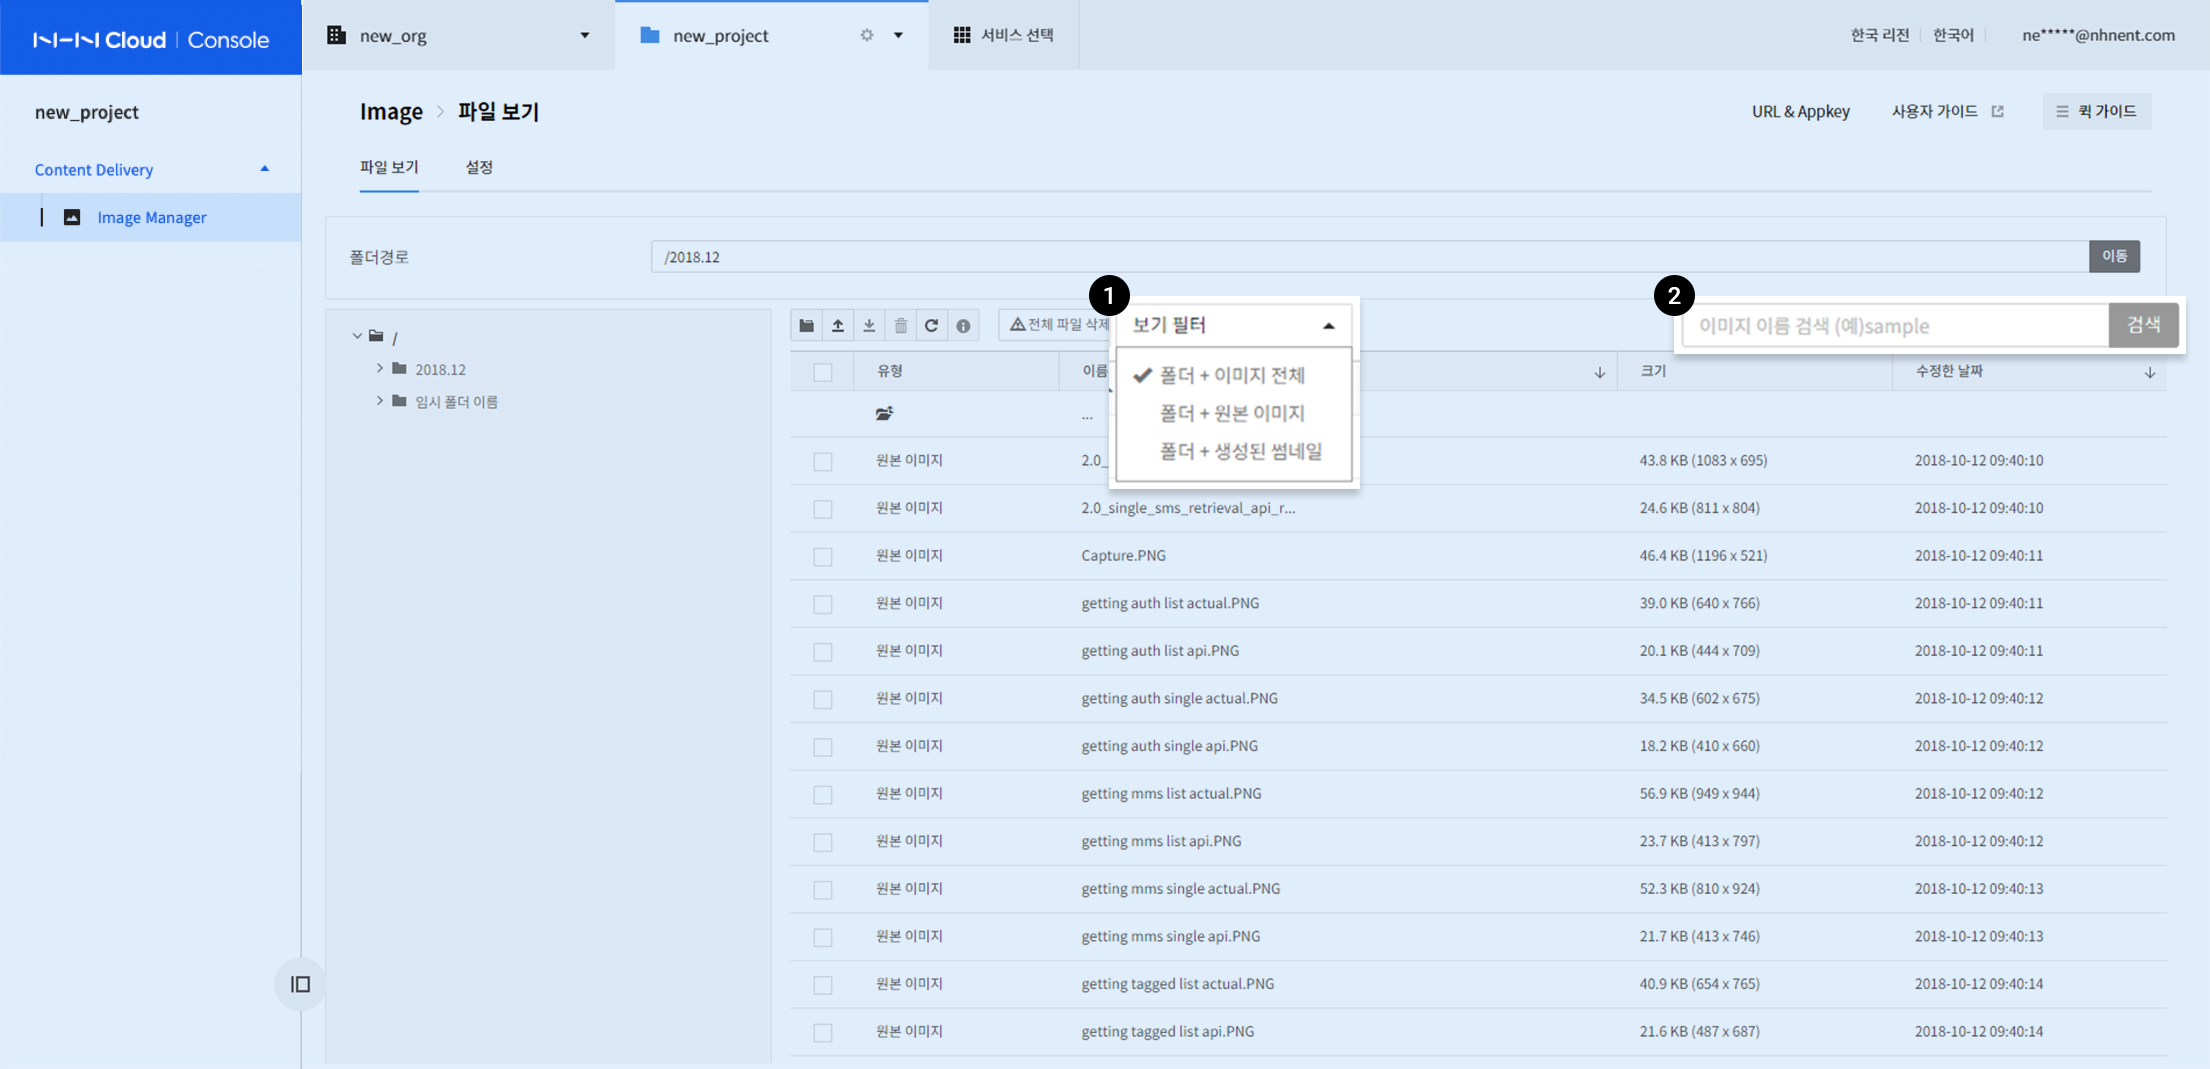
-
You can view files after filtering by the type of image file using 'View Filter'.
-
'Original Image' means an image file uploaded directly through the console or API, and 'Created Thumbnail' means an image created by applying an operation to the original image.
-
Search for the image file name from the current location or from the entire location.
-
All results that contain a search term are retrieved, similar to
like '%search term%'in the database. - Searches are case-sensitive.
- Input example: sample
- Example results: sample.gif, sample_2.gif, sample 3.gif, sample_sample_100x100.png
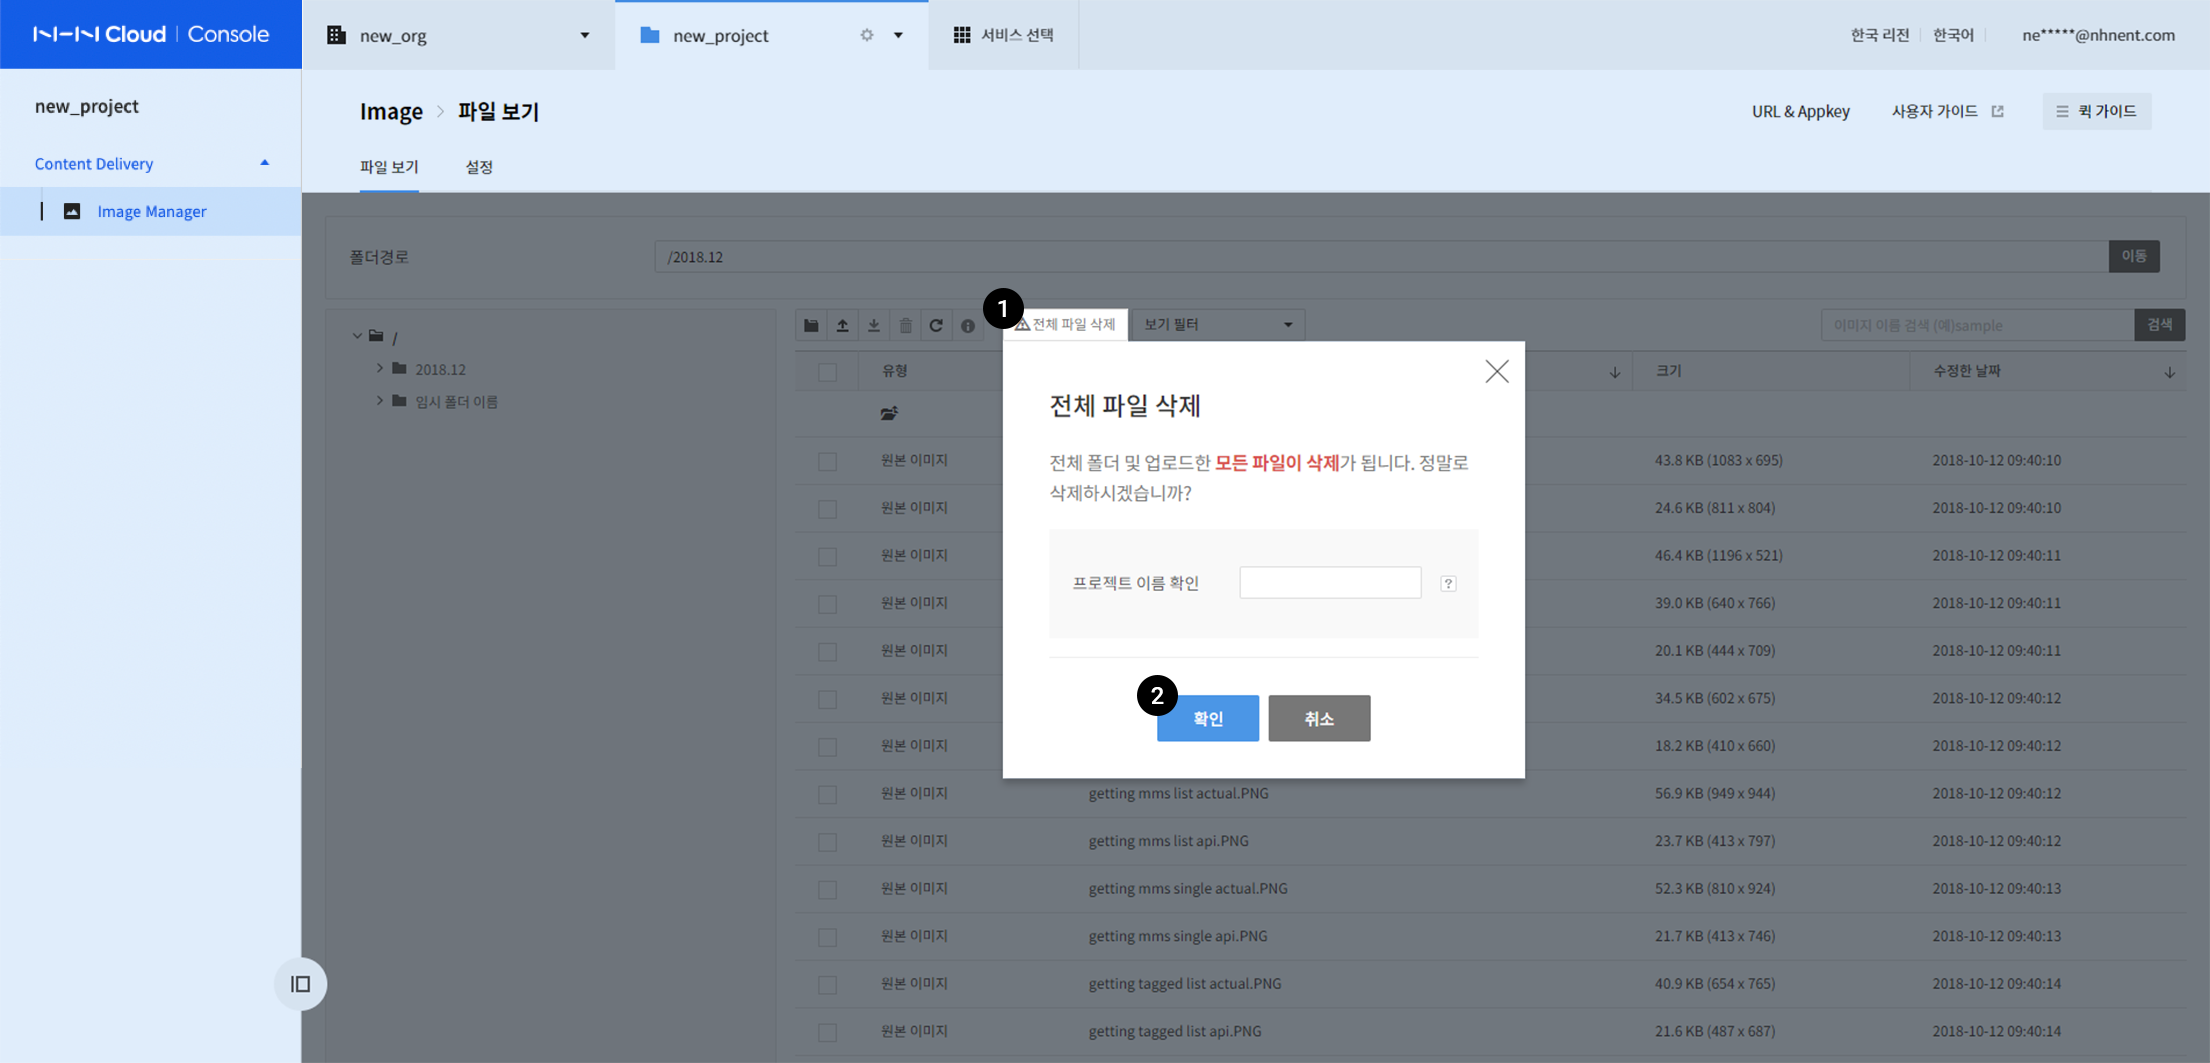
Delete All Files
-
Click Delete All Files.
-
To terminate the use of the service, all files must be deleted.
-
A deleted file cannot be recovered, so use it with caution.
-
Click Confirm.
Manage Thumbnail Options

Thumbnail options can be managed from the Settings screen of the menu.
You can generate thumbnails by a combination of several options.
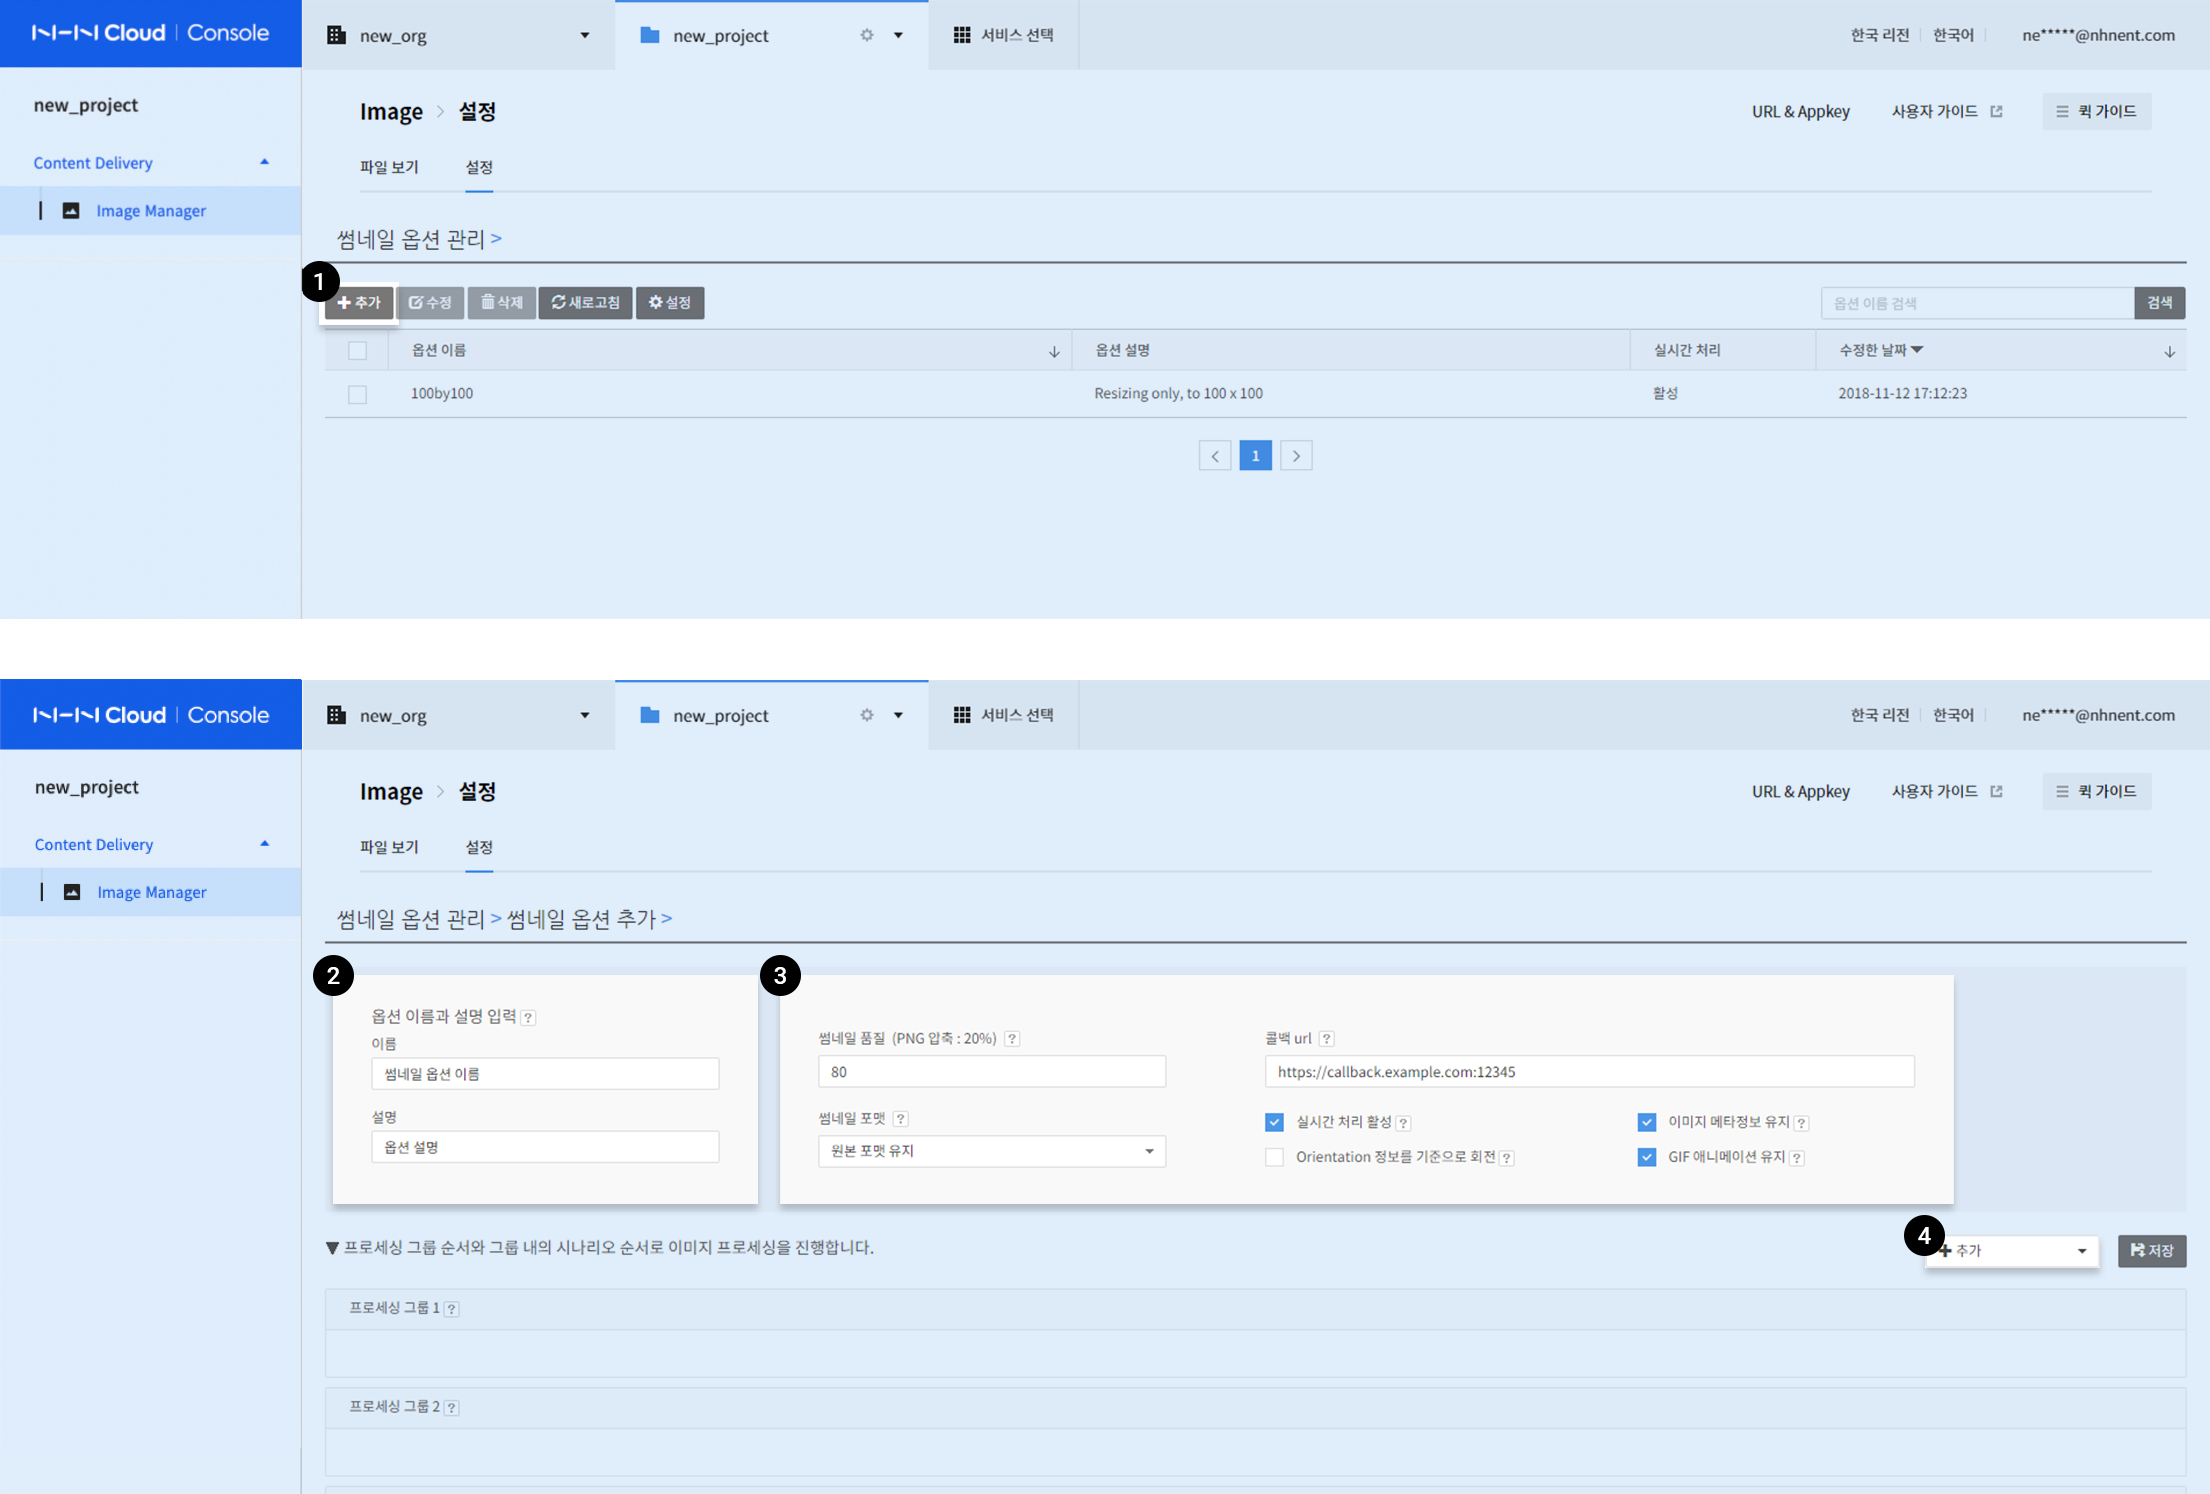
Create Thumbnails
-
Click Add to add thumbnail options.
-
Set name and description
-
Enter a name and description.
- When there is the same option name, it is recommended to add a identifier after it.
-
For the description, enter a brief description of the thumbnail option for easy identification by users.
-
Set image processing options
-
Set image processing options.
- Select the image generation quality and format.
- In 'Callback URL', enter the address to be notified of the thumbnail generation result.
- Select or clear the options 'Enable Real-time Processing', 'Maintain Image Meta Information', 'Rotate by Orientation', and 'Maintain GIF Animation'.
-
Circle Crop and Watermark, which are image composition, do not maintain the GIF animation effect.
-
Add image operation scenario
-
Click +Add to select image operation options.
- Scenarios are run by group and the same option cannot be configured in duplicate.
- Within the group, click the arrow button (▲▼) on the right side to set the scenario order.
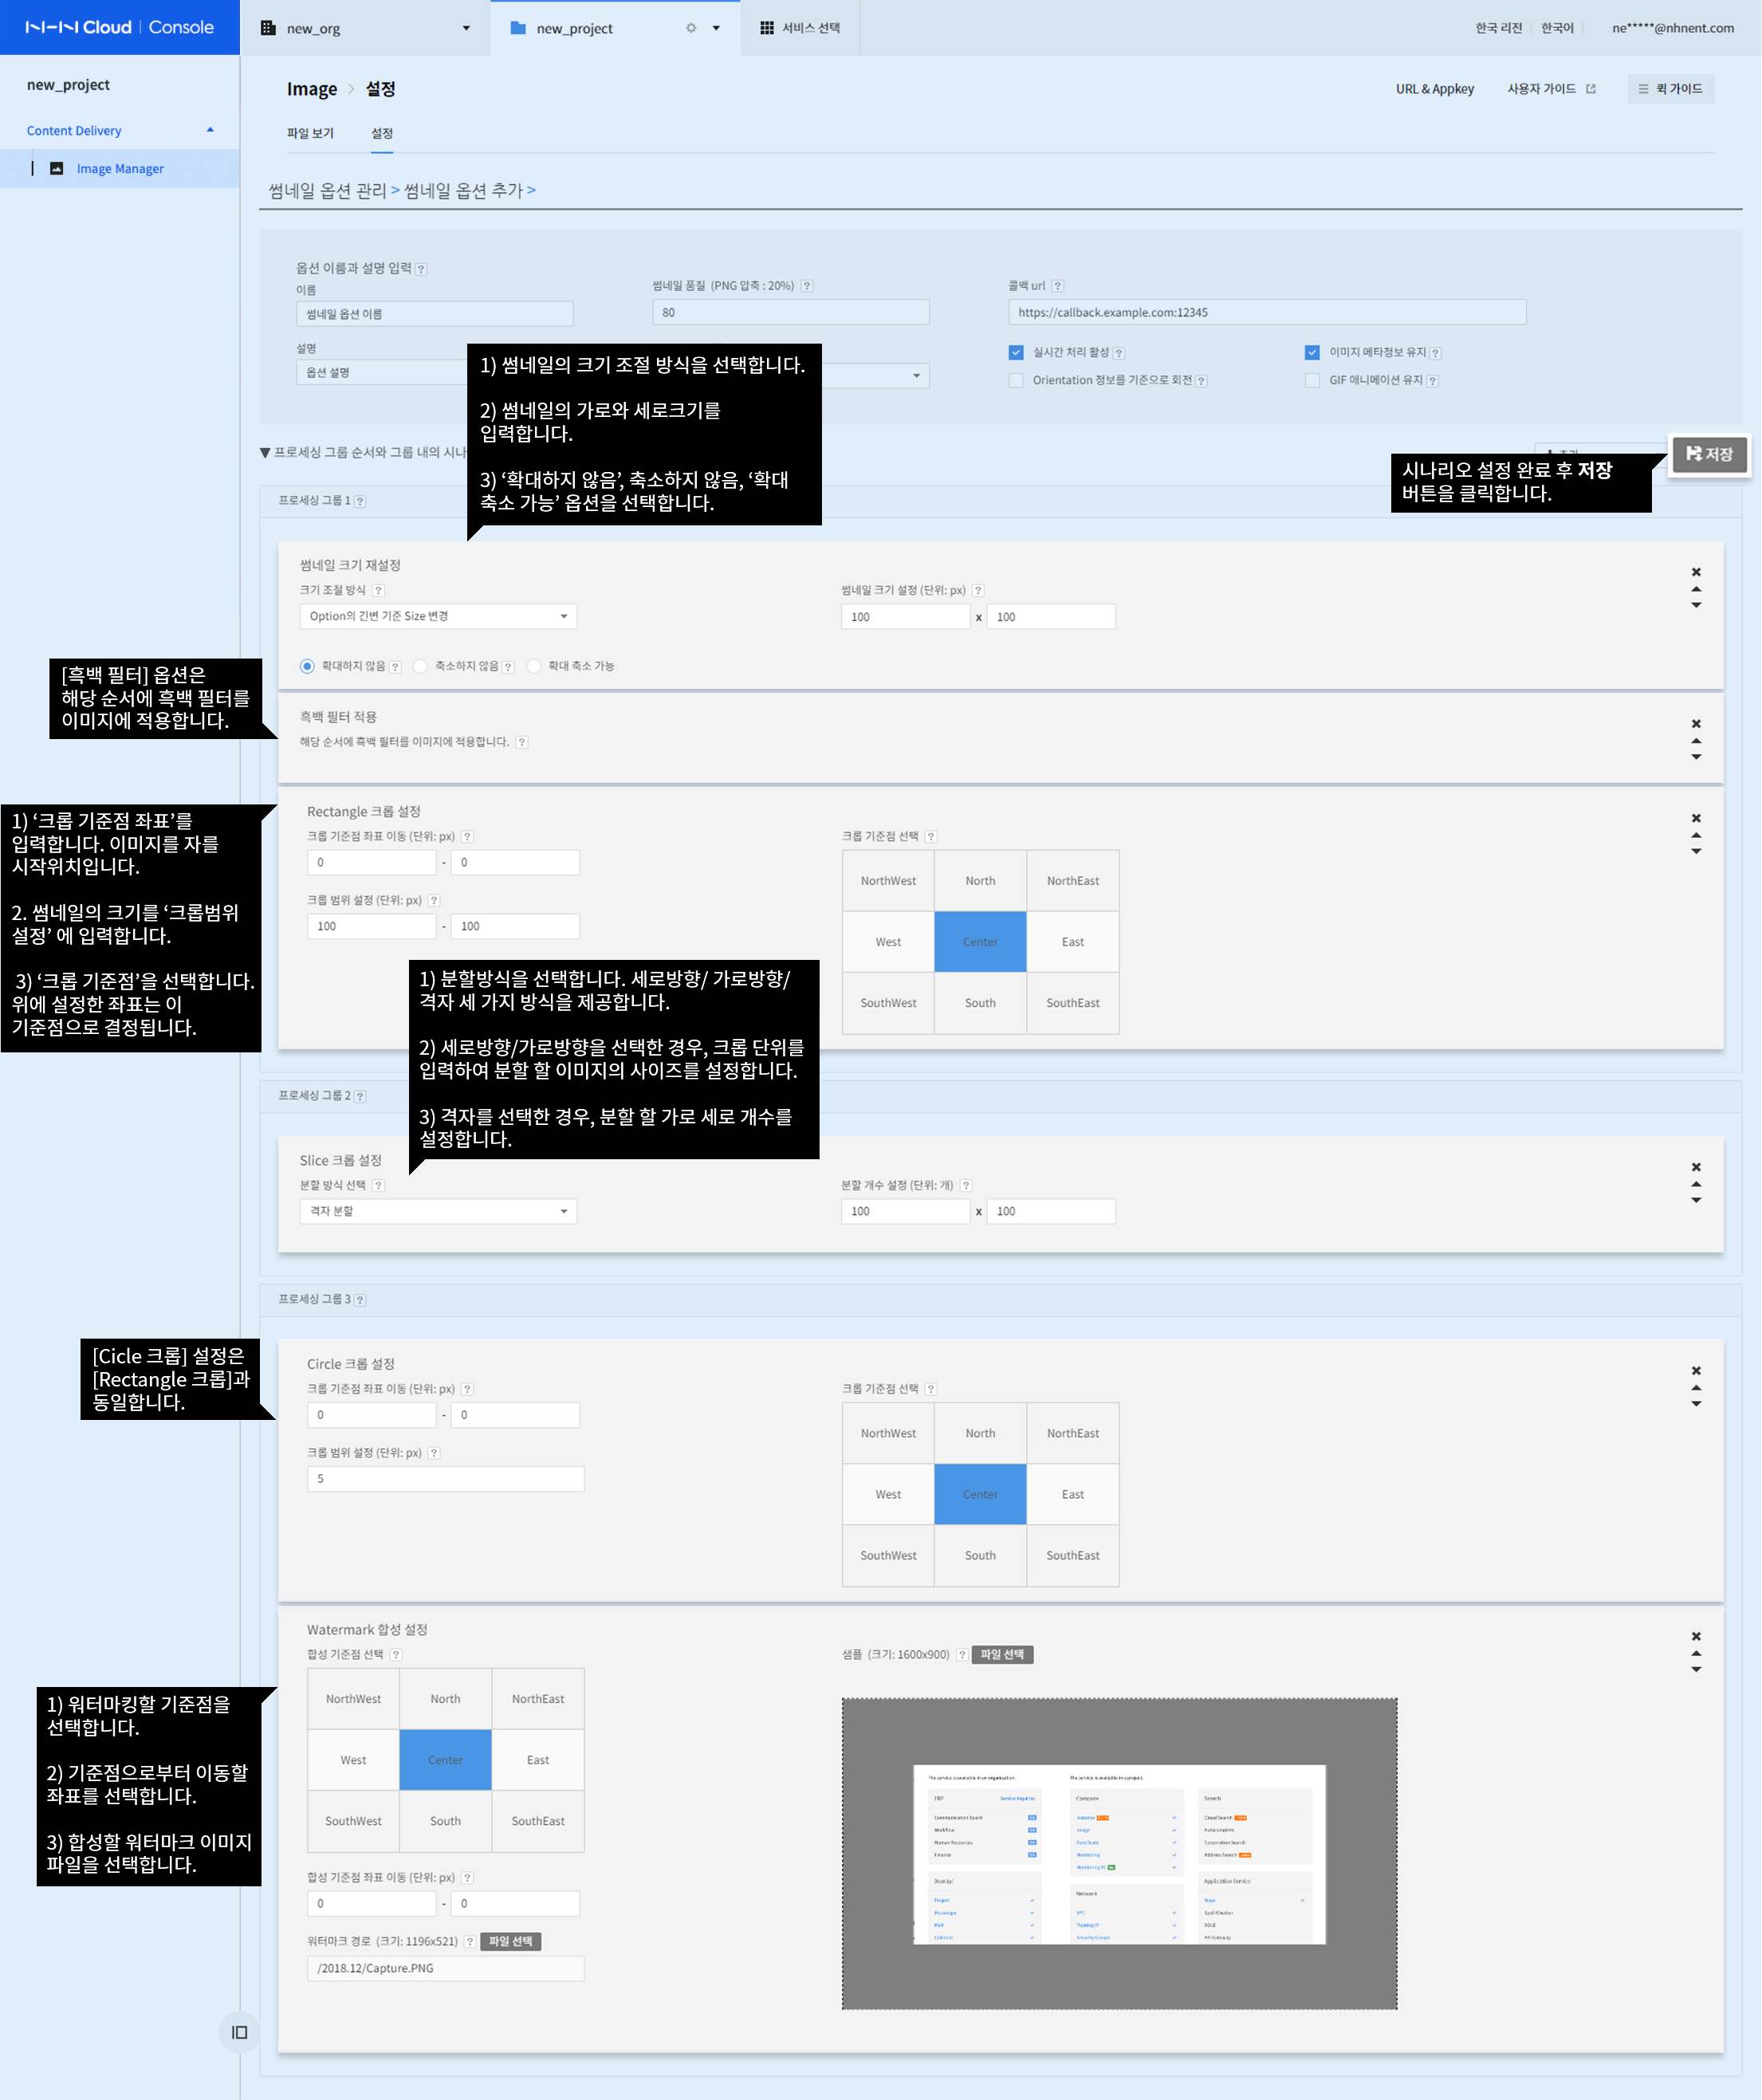
The resizing of thumbnails are performed as follows.
- Change the size based on the longer side of Option: Perform resize while maintaining the ratio.
- Example: If you resize a 400x300 image with the thumbnail size option 200x100, it will be resized to a 200x150 image.
- Change the size based on the shorter side of Option: Perform resize while maintaining the ratio.
- Example: If you resize a 400x300 image with the thumbnail size option 200x100, it will be resized to a 133x100 image.
- Change the size to fit the width and height of Option: Perform resize to the configured size without maintaining the ratio.
- Example: If you resize a 400x300 image with the thumbnail size option 200x100, it will be resized to a 200x100 image.
- Change the size based on the width of Option: Perform resize while maintaining the ratio.
- Example: If you resize a 400x300 image with the thumbnail size option 200x100, it will be resized to a 200x150 image.
- Change the size based on the height of Option: Perform resize while maintaining the proportions.
- Example: If you resize a 400x300 image with the thumbnail size option 200x100, it will be resized to a 133x100 image.
After completing the scenario settings, click Save.
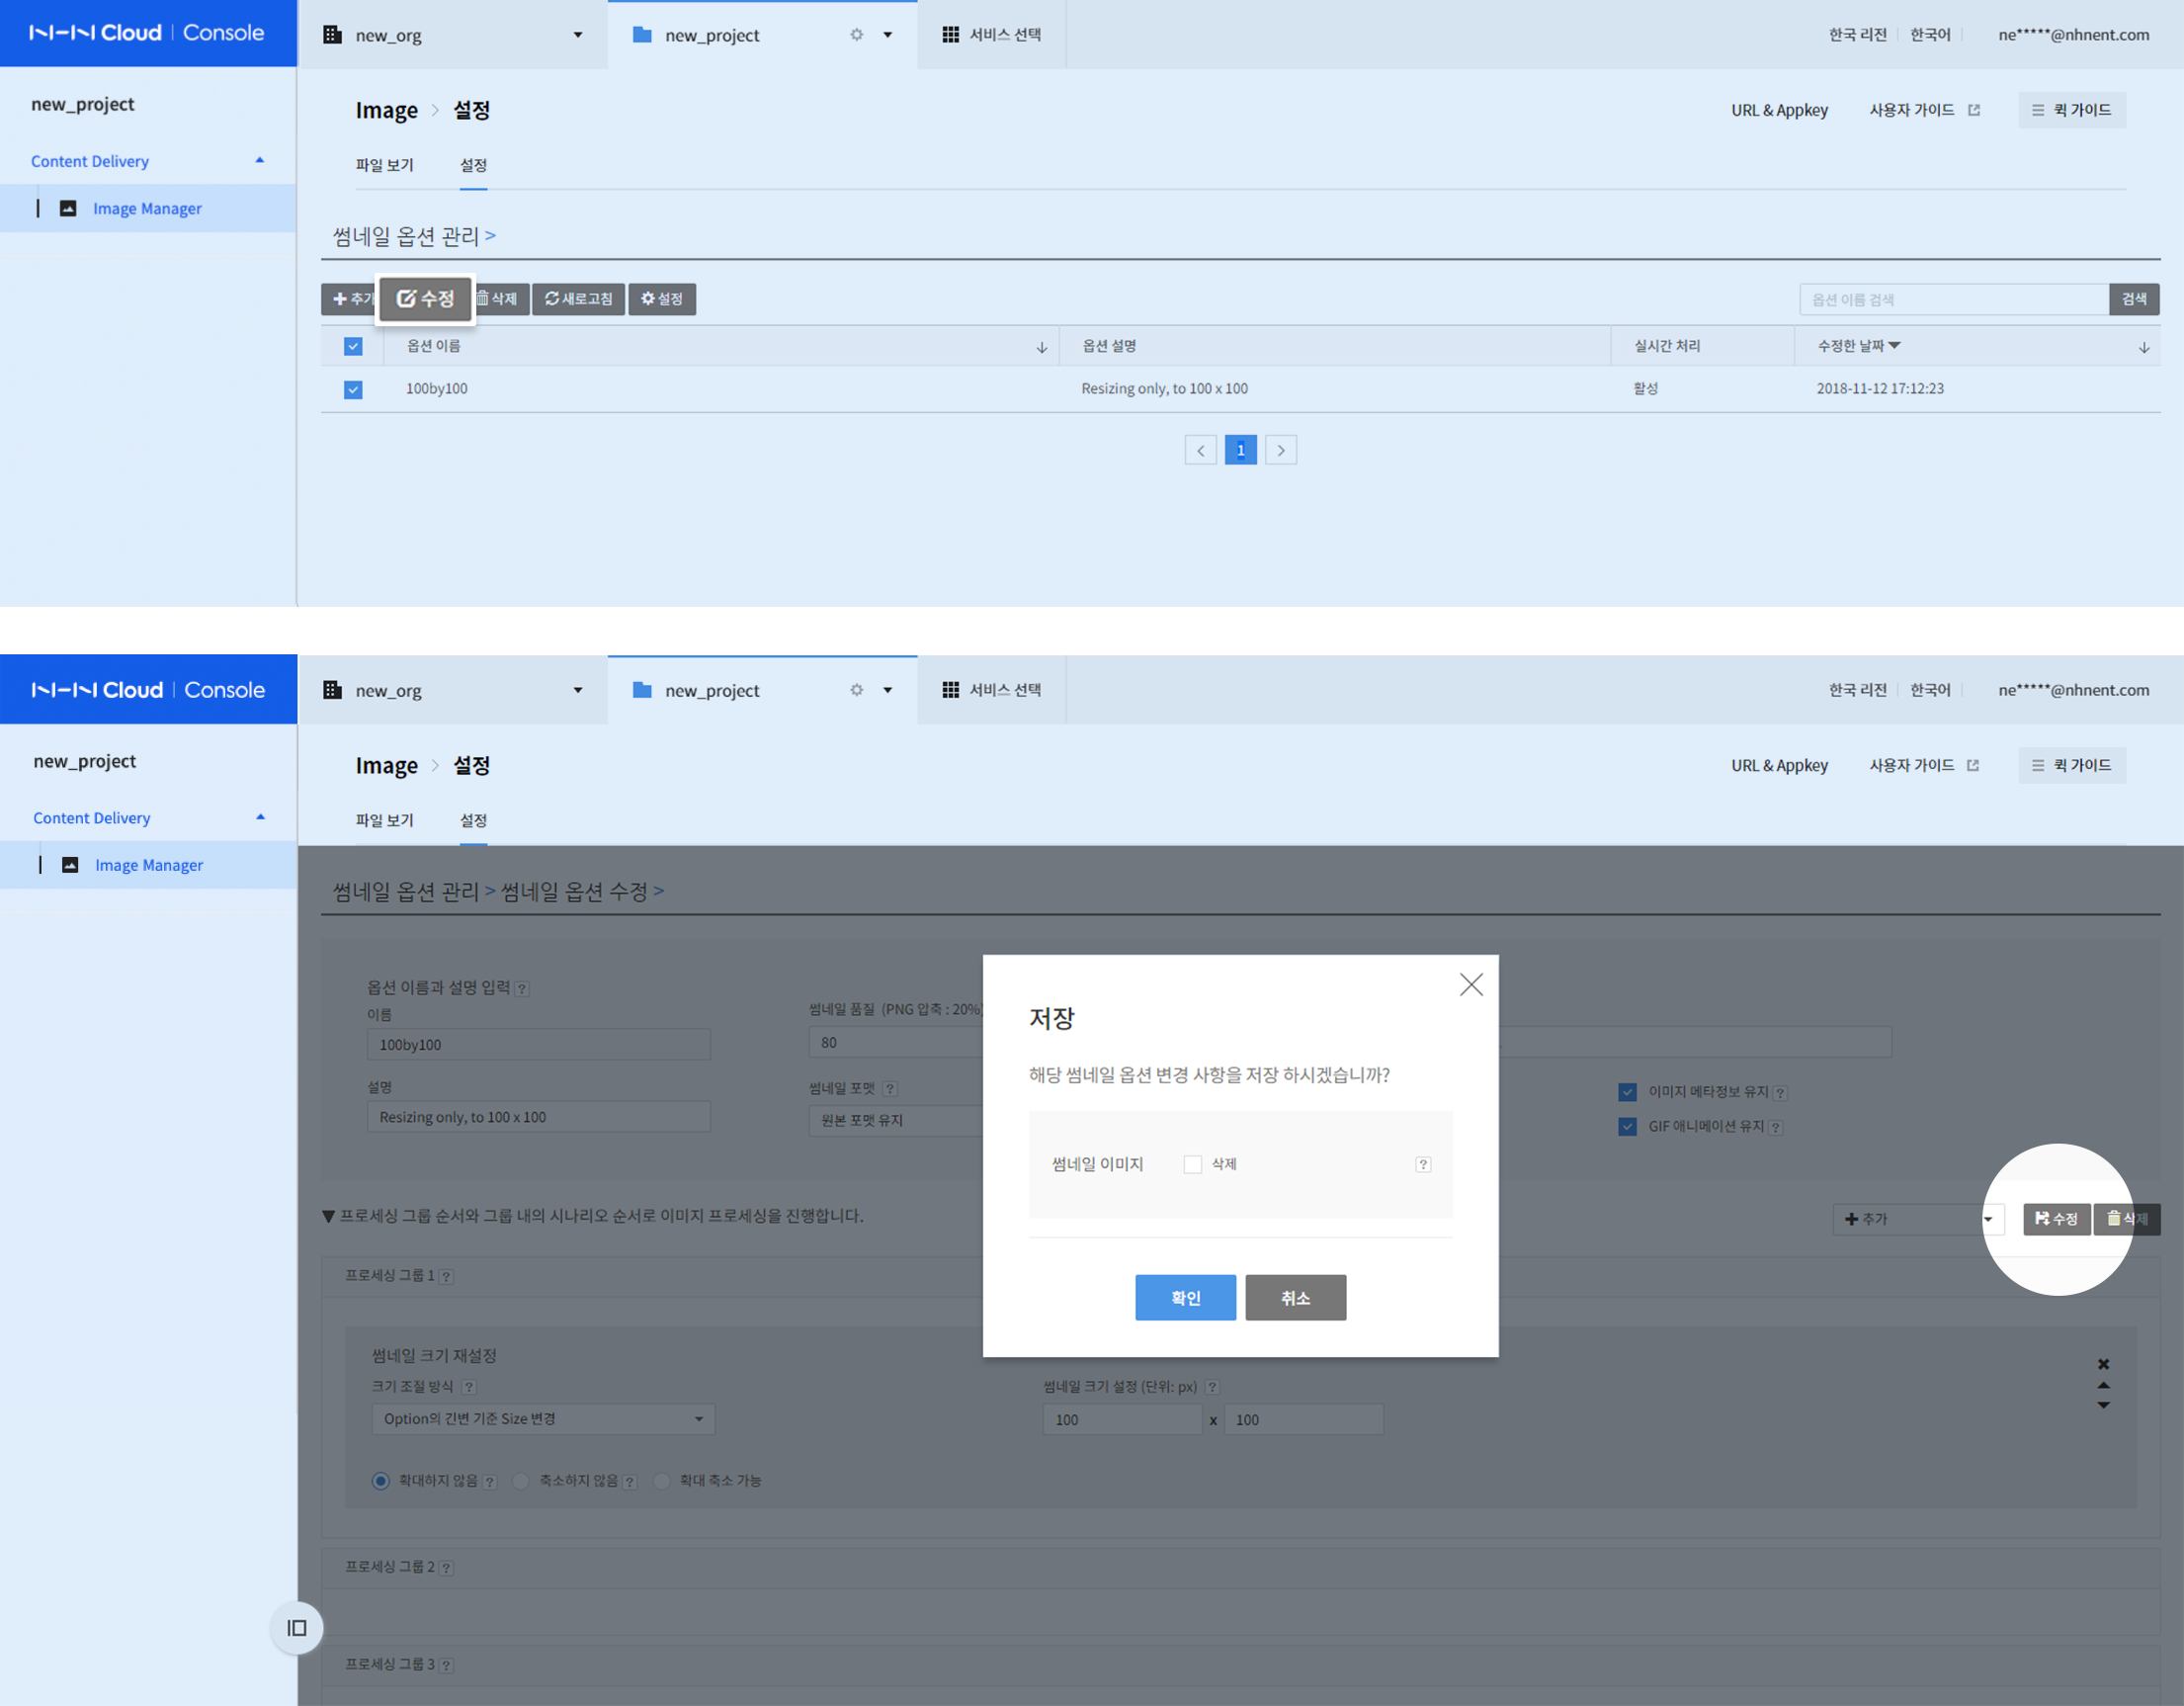
Edit Thumbnails
-
Select a thumbnail and click Edit.
-
Edit the thumbnail options and click Edit.
-
Even if you modify the options, the thumbnails created with the settings before modification are not modified.
- If you check the 'Delete Operation Image' checkbox in the dialog box, you can bulk delete thumbnails created with the settings before modification.
Delete Thumbnails

Click Delete to delete the thumbnail option.
- You can delete the selected thumbnail option with the Delete button.
- If you check the 'Delete Operation Image' checkbox in the dialog box, you can bulk delete thumbnails created with the operation.
User Settings
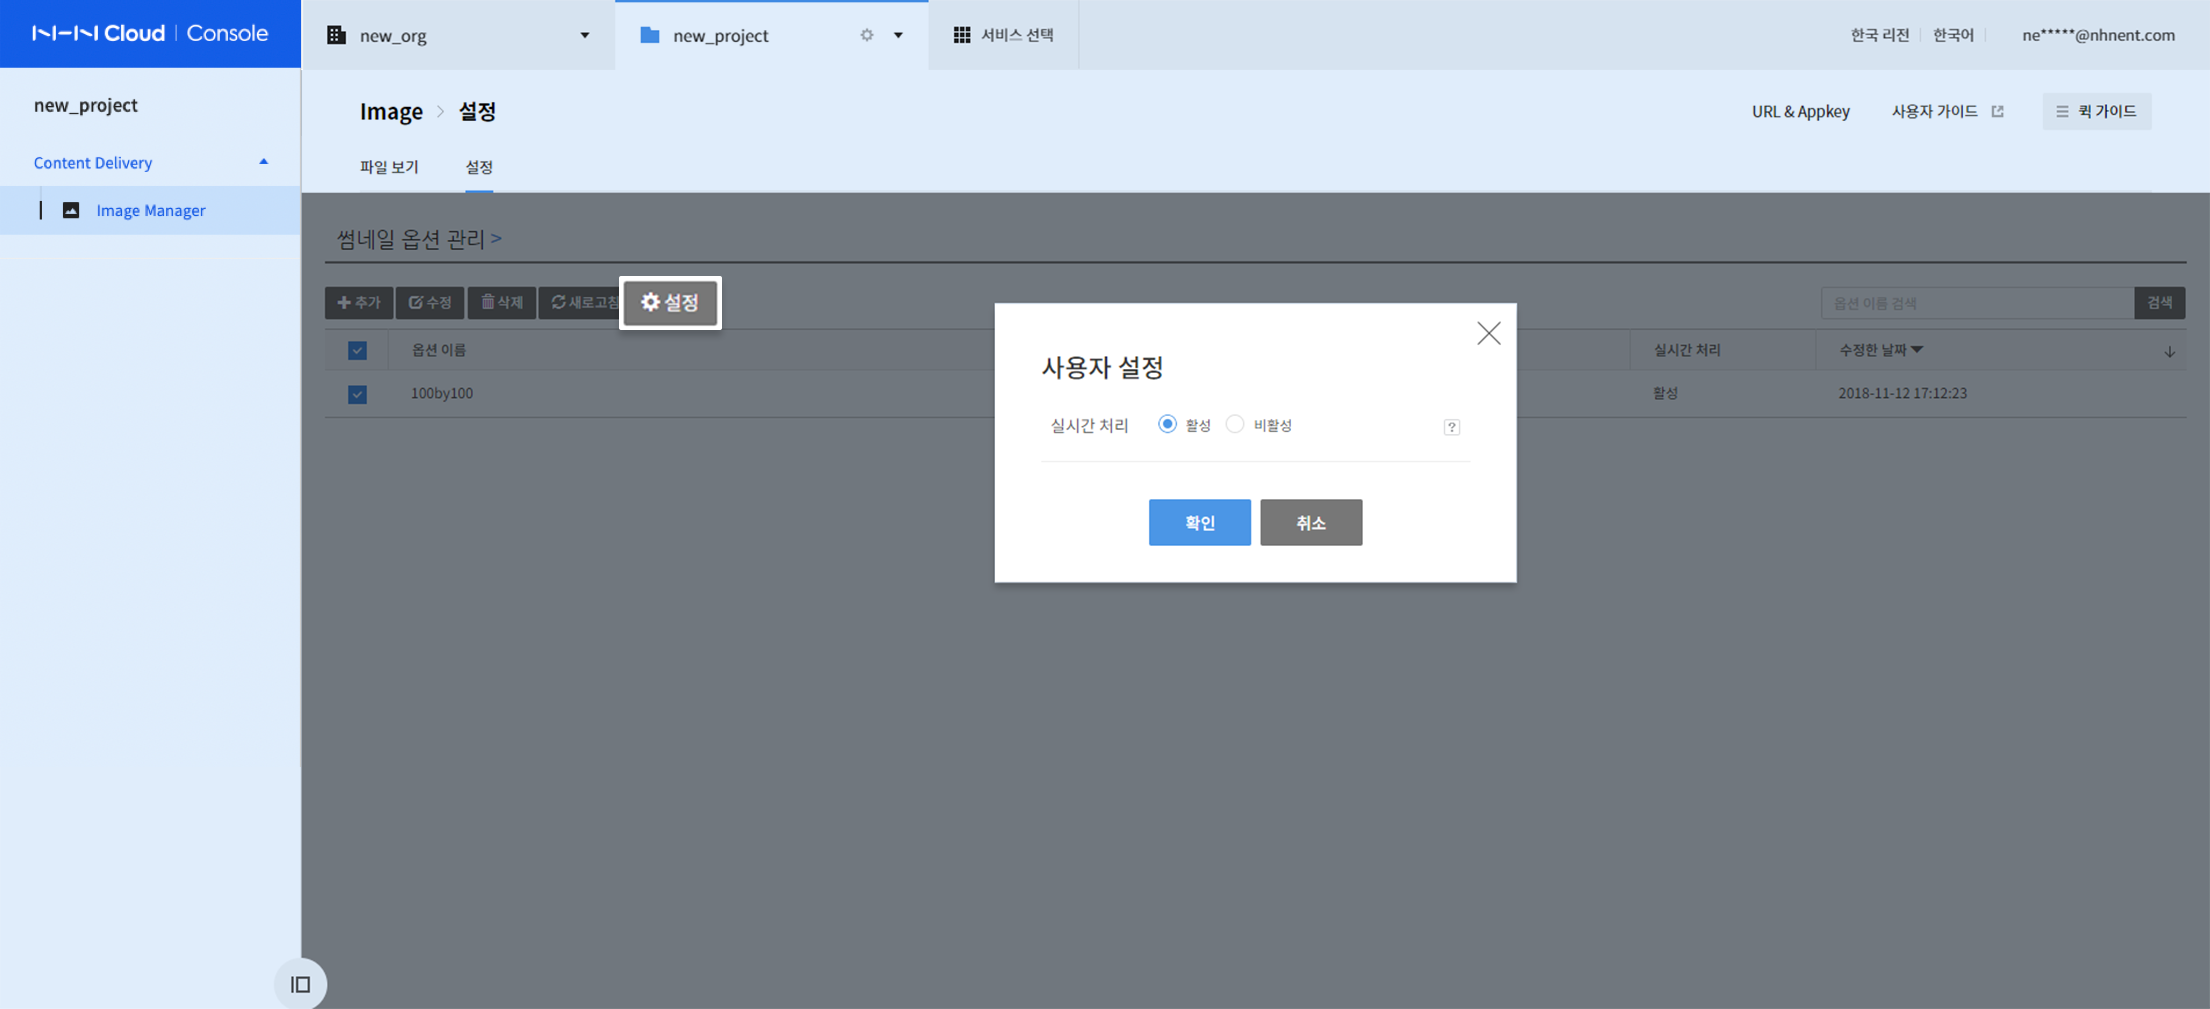
-
Click Setting.
-
Choose to enable/disable real-time processing.
Table of Contents
- Content Delivery > Image Manager > Console User Guide
- Manage Folders and Image Files
- Toolbar Icon Description
- Create a Folder
- Upload Image Files
- Download
- Delete Files or a Folder
- View Properties
- Query and View the List
- Delete All Files
- Manage Thumbnail Options
- Create Thumbnails
- Edit Thumbnails
- Delete Thumbnails
- User Settings